2. Set Up - Creating an Easyship Account for the Admin Portal
In order to link your Marketplace to your account in the Easyship application, you will need to set up an Easyship Account inside the Marketplace Admin Portal.
Before starting, you will need to ensure you have an Easyship Account, please ensure you have created an account with Easyship here - simply choose 'Sign Up' at the top right of the page - or sign in if you already have an account.

NOTE
You will need separate Easyship accounts for each different countries that you are shipping from (in both the Marketplace and Easyship). Eg, if you have 2 countries you are shipping from, Australia and USA, then you will need a different Easyship Account for AU and US.
Easyship Accounts in the UC Marketplace
Once you have signed up to an Easyship account, log in to the Marketplace Admin Portal (It will be easier if you have 2 windows open, one logged into your Easyship, and the other logged into UC Marketplace).
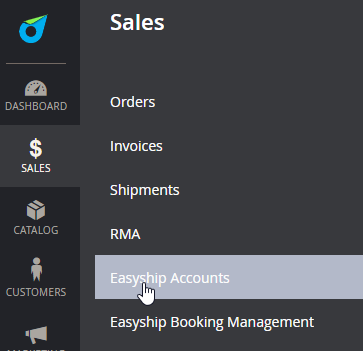
In the Marketplace Admin Portal, navigate to Sales > Easyship Accounts.
When the page loads, you will see a grid of Easyship Accounts you have access to if you created them before. Select Add New Account.
The page will load with fields to populate. Please see what each of the fields represent:
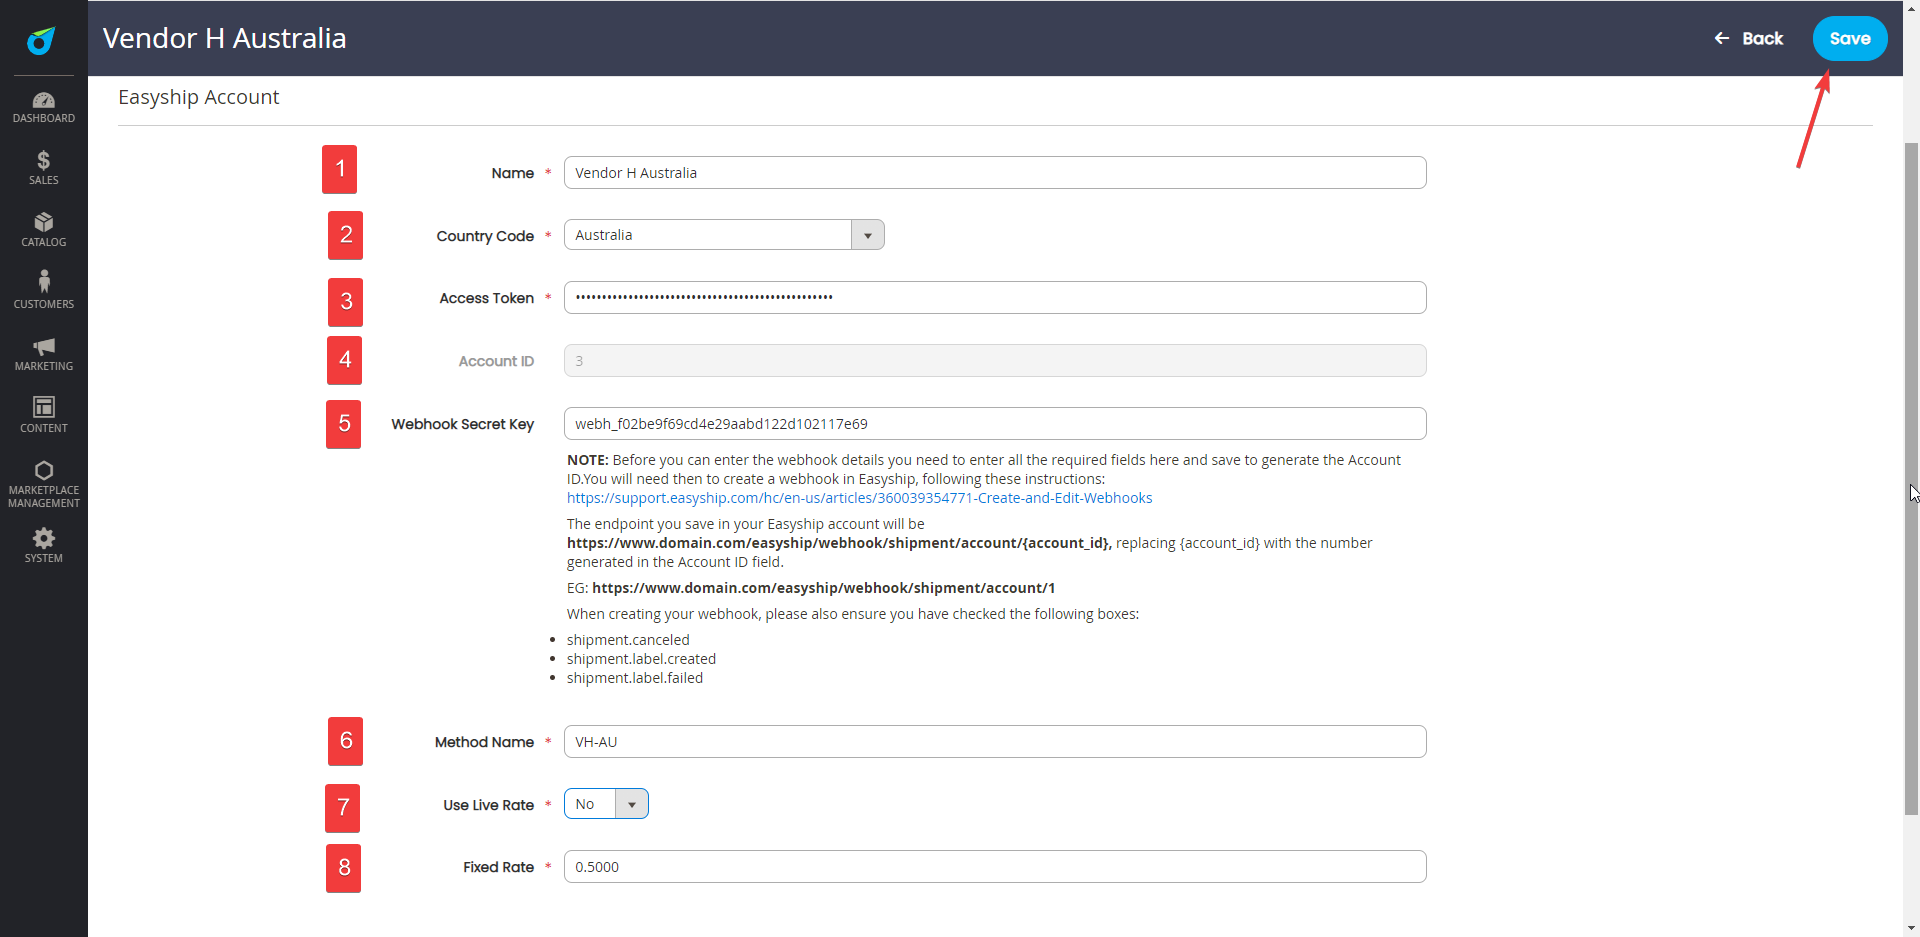
- Name: The name of the Easyship Account to use - Generally this should include your Company Name. In this case it's for Vendor H, so we've labelled it as "Vendor H Australia" - as this will be for the Australian account
- Country Code: This will determine which country this account will be associated with.
- Access Token: The access Token can be obtained in the Easyship dashboard. See below
- Account ID: This will only populate once the account has been saved the first time. You will need to come back to this for the next field.
- Webhook Secret Key: The webhook secret key will be needed to ensure you get updates for a shipment in Easyship. There are further instructions to this below.
- Method Name: This will appear on the Front end and Back end of the platform as the shipping name.
- Use Live Rate: This will determine if you would like to show the customers Live Rates (based on the products in the customer's cart/couriers available) or to use a Flat rate, wherein the Vendor will select the courier in the backend after an order is placed.
- Fixed Rate: This will only appear if "Use Live Rate" is set to "No". This is the dollar value (base currency) that will be charged to the customers instead of the live rates.
See below the steps/sections that are required from the Easyship dashboard.
Configuring the Easyship Access Token in Easyship
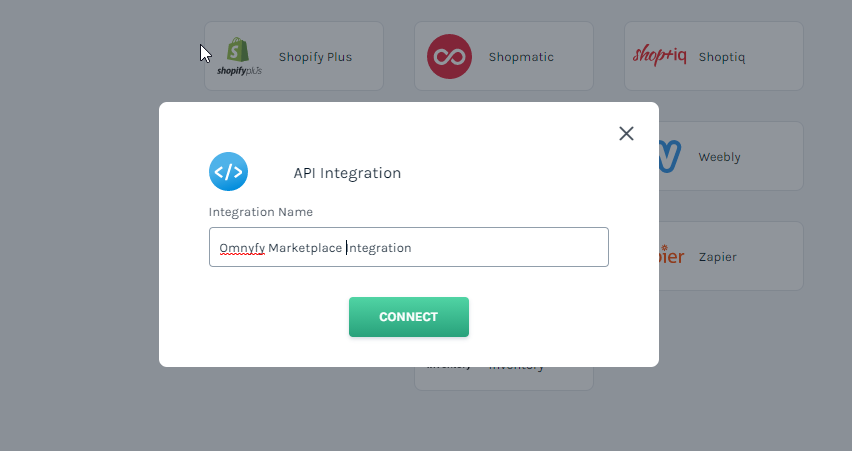
In Easyship, navigate to Connect > New Integration and select "API Integration" at the bottom of the list.
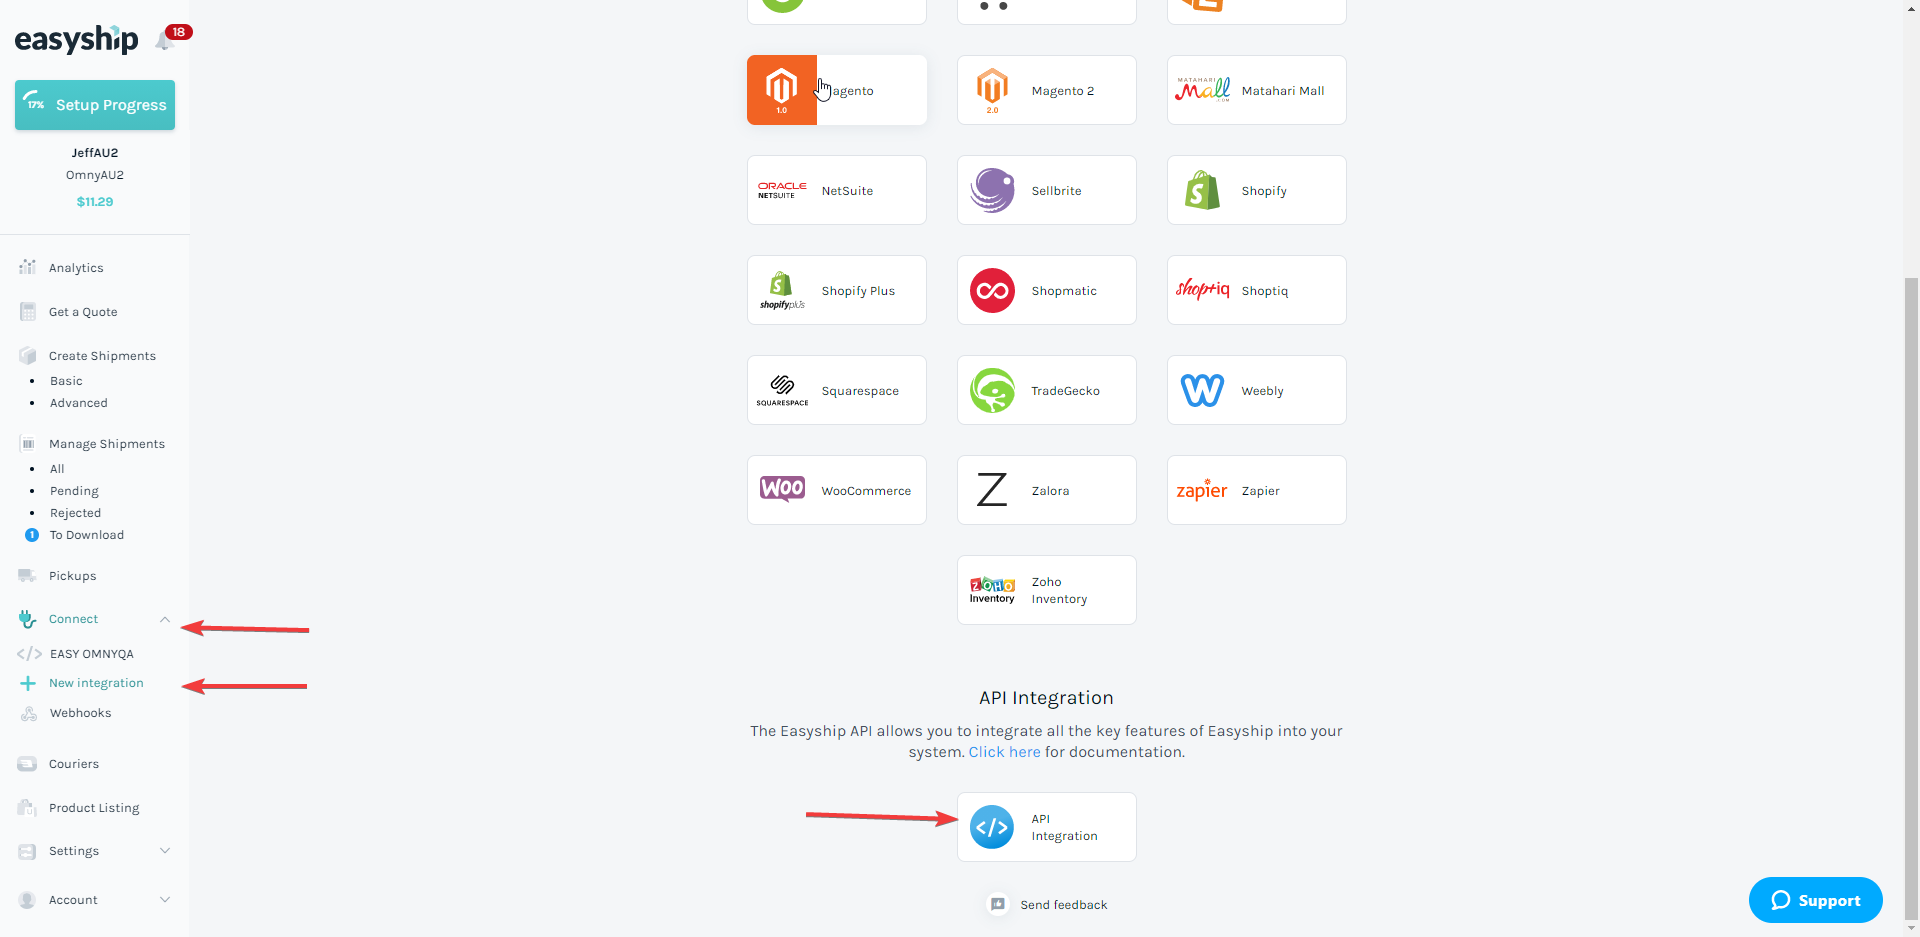
Add a name to the integration and select Connect.
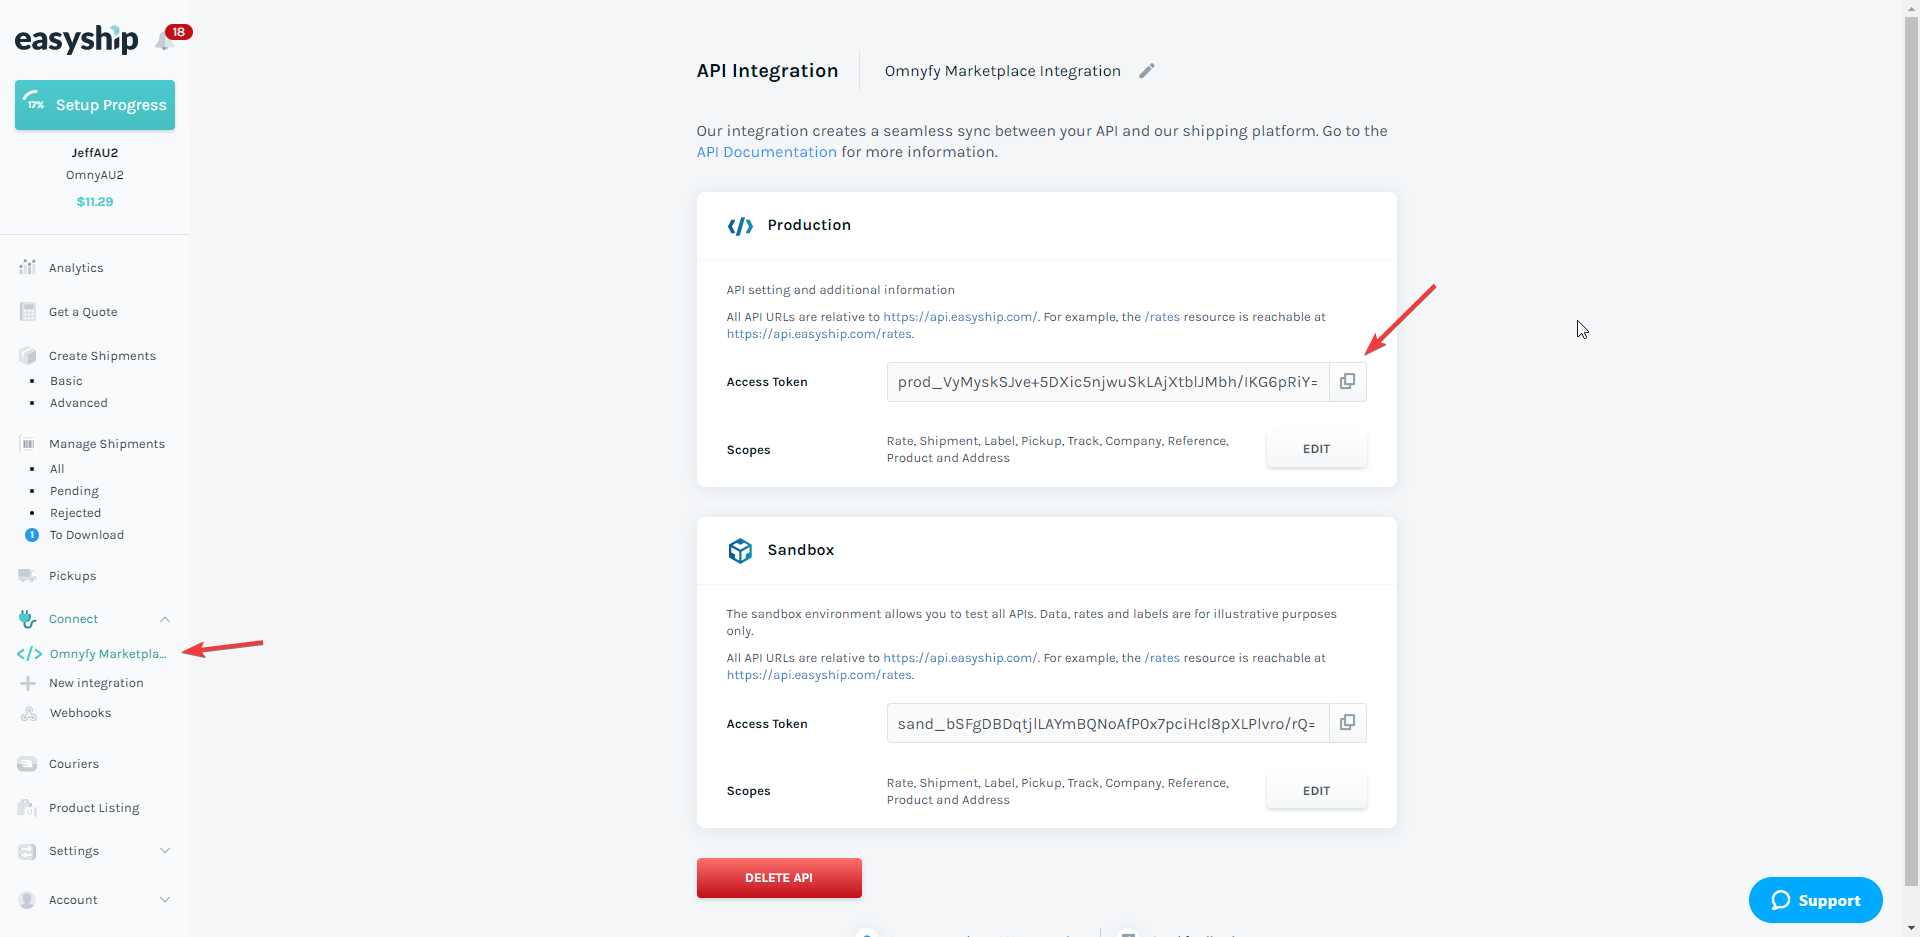
Once the page has loaded, copy the Production Access Token. There's a little button on the right that copies that automatically. This is the value you place in field Access Token in the Marketplace Easyship Account (#3 from the above fields list). You will also see your new Integration appear on the left.
Configuring the Easyship Webhooks
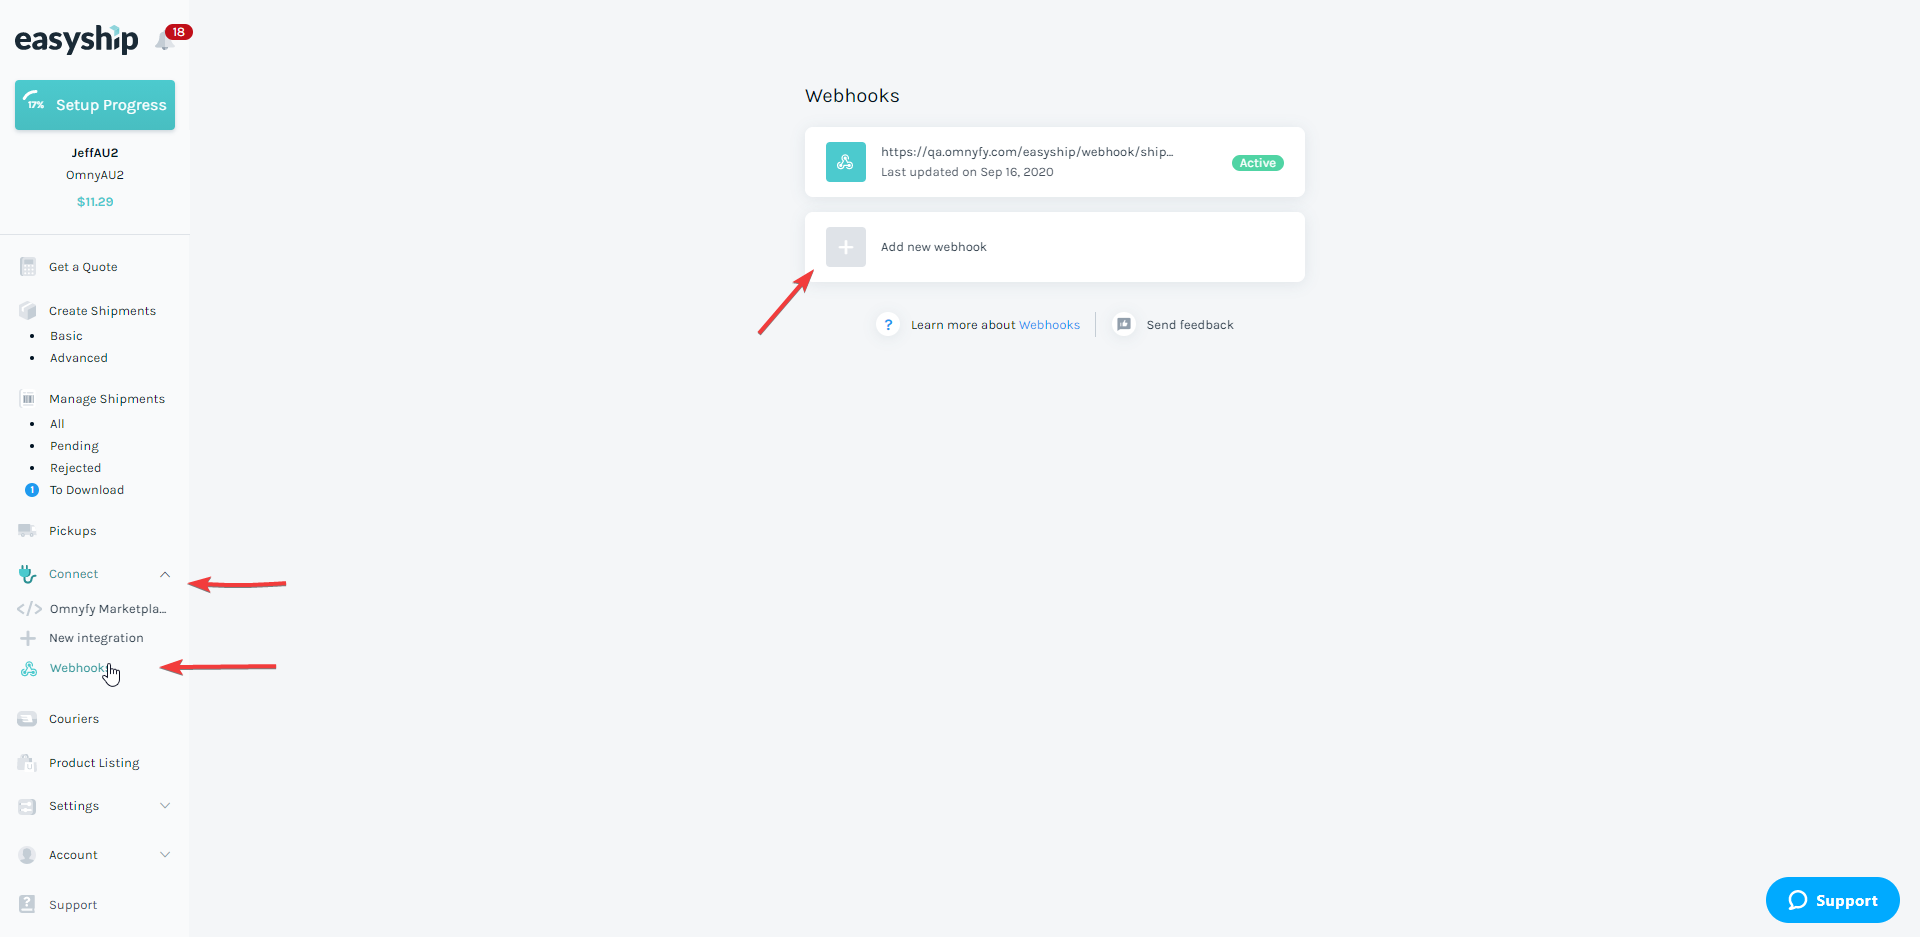
In Easyship, navigate to Connect > Webhooks and select "Add new webhook".
You will first need to have saved your Marketplace Easyship Account to generate an Account ID. Once that is saved, you will need to paste the following URL into this Webhook Endpoint URL:
https://{domain}/easyship/webhook/shipment/account/{account_id}
Where {domain} is the main website URL (eg www.marketplace.com) and {accound_id} is the ID for your Easyship Account (see Account ID in the Marketplace when you go back to edit the Account).
Here's an example Webhook Endpoint URL:
https://www.marketplace.com/easyship/webhook/shipment/account/1
When you have the Webhook Endpoint URL created, please select also the following Event types.
- shipment.canceled
- shipment.label.created
- shipment.label.failed
- shipment.tracking.status.changed
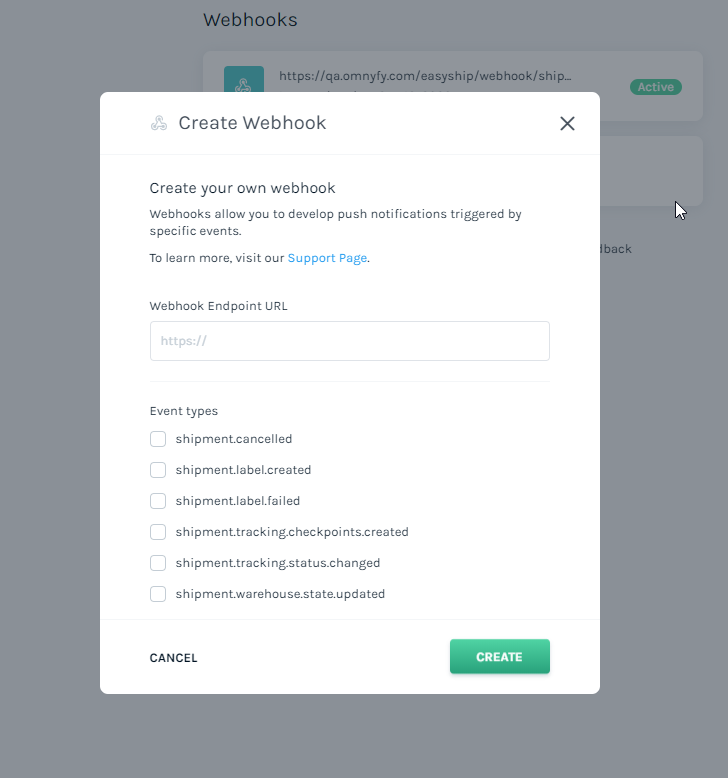
Once you select Create, a new pop up will appear with the Secret Key. This is the key you need to copy into Webhook Secret Key field in the Marketplace Admin Portal. There is also a button/icon to the right of it that can copy this key automatically to your clipboard.
Ensure you have also changed Status to Active.
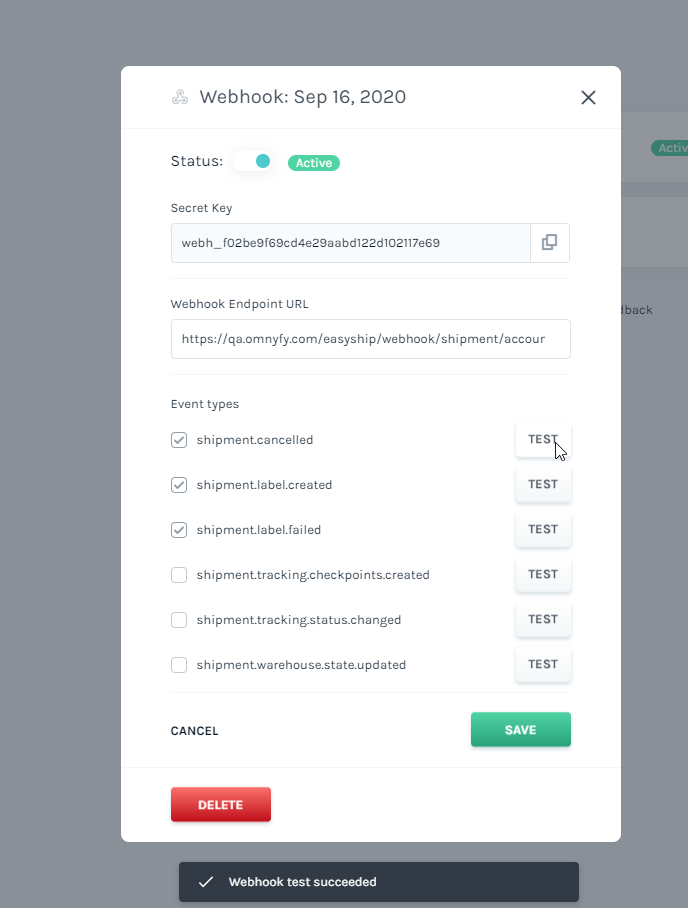
Once you have the Webhook Secret Key pasted in the Marketplace Admin Portal, and all the fields are populated, save it (while leaving the above pop up still open in Easyship). When the Marketplace Easyship account is saved, you can test your Event types by selecting Test. You will see a notification at the bottom if the Webhook passed or if there was an issue.
You have now successfully hooked up your Easyship account with the UC Marketplace. The next step will be to choose which location will use this account.