Vendor Subscription Plans
Subscriptions enable Marketplace Owners to charge vendors to participate in a marketplace. Omnyfy's Vendor Subscription Module uses Stripe Subscriptions to receive payments. If you do not have a Stripe Subscription, click here to create one.
There are two main steps to creating a Vendor Subscription Plan in Omnyfy.
Step 1: Create a Subscription Plan in Stripe (if you require payment from vendors or plan to charge them later)
Step 2: Publish a Subscription Plan in Omnyfy and link it to your Stripe subscription
This article focuses on publishing your Subscription Plan in Omnyfy. To learn how to create Subscription Plans in Stripe, please click here {LINK}
Creating a Subscription Plan in Omnyfy and linking it to your Stripe Subscription (if applicable)
-
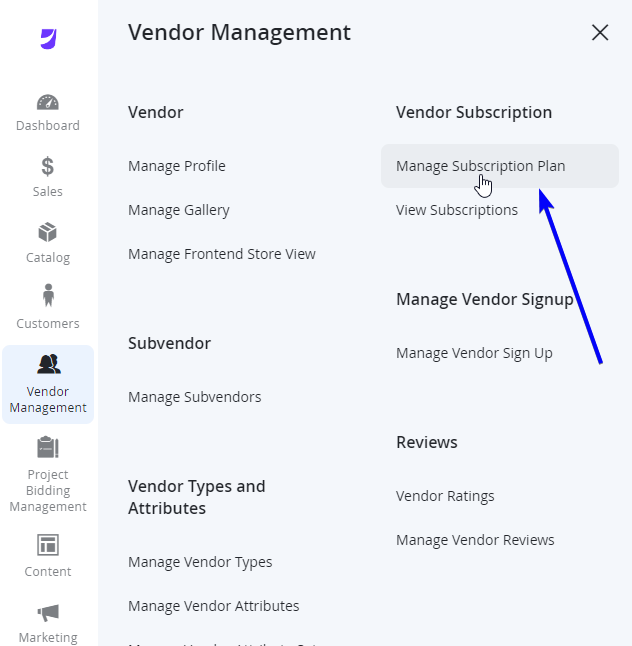
As a Marketplace Owner, navigate to Vendor Management > Vendor Subscription > Manage Subscription Plan.
-
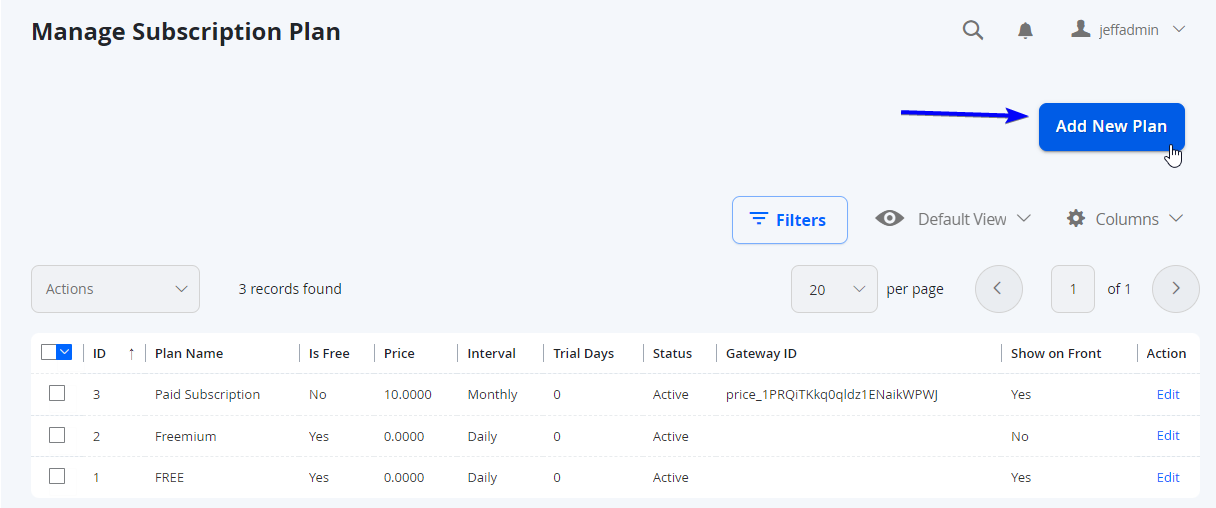
Select Add New Plan from the top right.
- Populate the fields as necessary
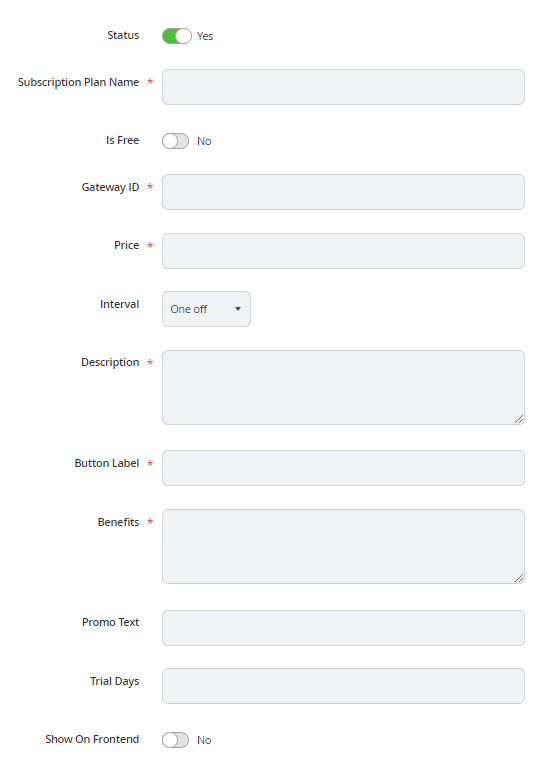
| Field | Notes |
|---|---|
| Status | This is the status of the Subscription Plan. Deactivating the plan will hide it front the front end and backend, but the subscribed users can still be billed on it. |
| Name of the Subscription Plan - ideally ensure that it matches the tier / plan name in the payment gateway. | Subscription Plan Name |
| Is Free | If the plan is free, set the toggle to Yes. Subscribers do not have to enter payment details for free plans. |
| The field will display only when the Is Free field is set to No. Currently the only Gateway ID that is applicable is Stripe. Copy and Paste the ID from the Payment Gateway Subscription Plan |
| The field will display only when the Is Free field is set to No. |
| Interval | Select the Interval (e.g. Daily, Weekly, Monthly, Every 3 months, Every 6 months, Annually) for which the users are subscribed for. This will need to be the same settings as per Stripe if using paid options. |
| Enter the short description (255 characters limit) of the subscription plan to the plain text editor. | Description |
| Enter the label of the subscription button. 20 characters limit. For example, "Sign Up" or "Join Now". | Button Label |
| This field can be used to provide benefits offered under this subscription. Please use "|" (vertical line) to separate benefits into different bulleted lines. 255 characters limit. | Benefits |
| Enter the promotion text of the subscription plan. For example, Recommended, Coming Soon, Popular. If this field is empty, don't show any promo message on the front end. | Promo Text |
| Trial Days | This is mostly applicable to vendors on paid plans that can have trial days. This allows the subscription to withhold charging the vendors with their first invoice until the amount of Trial Days passes from the date of initial Vendor Approval. |
| Show on Front End | If the toggle is set No, then the subscription plan will not appear on the front end. Please note, this does not mean the plan is disabled. The marketplace owner can add a vendor to the plan via the backend provided they are already subscribed to another plan. |
Subscription Inclusions enables the Marketplace Owner to set a one-off number of products that the Vendor can have, as part of their subscription. This includes products created by the Marketplace Owner.

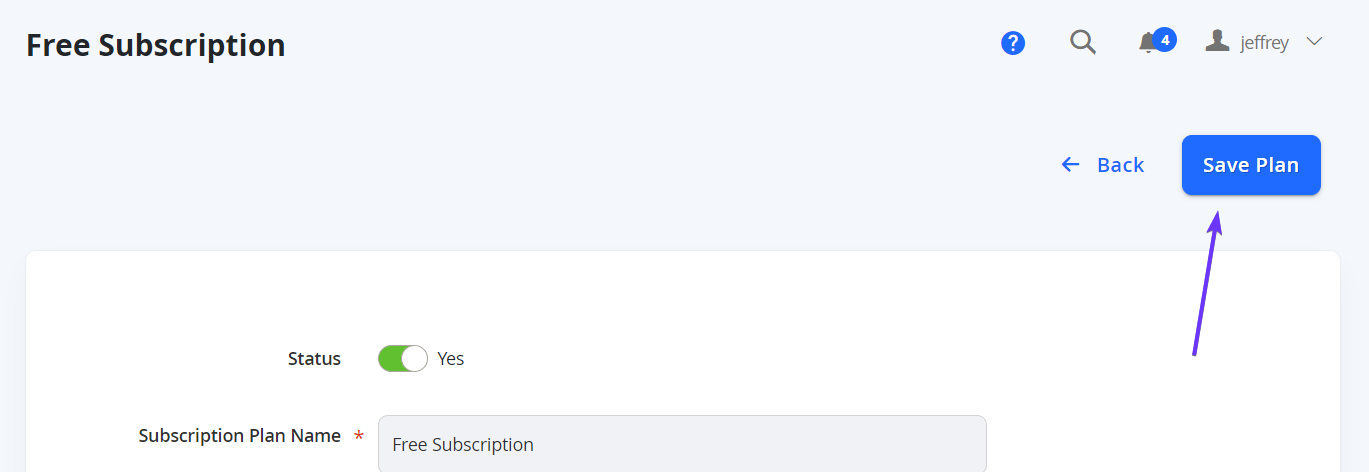
- Once you are satisfied, you can select Save Plan from the top right.
Linking a Subscription Plan to a Vendor Type
-
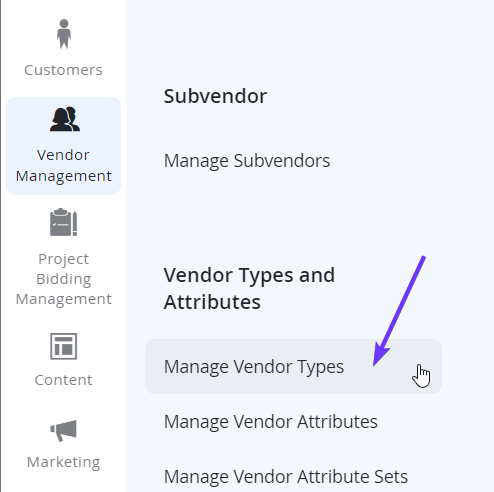
From the admin as a Marketplace Owner, navigate to Vendor Management > Vendor Types and Attributes > Vendor Types.
-
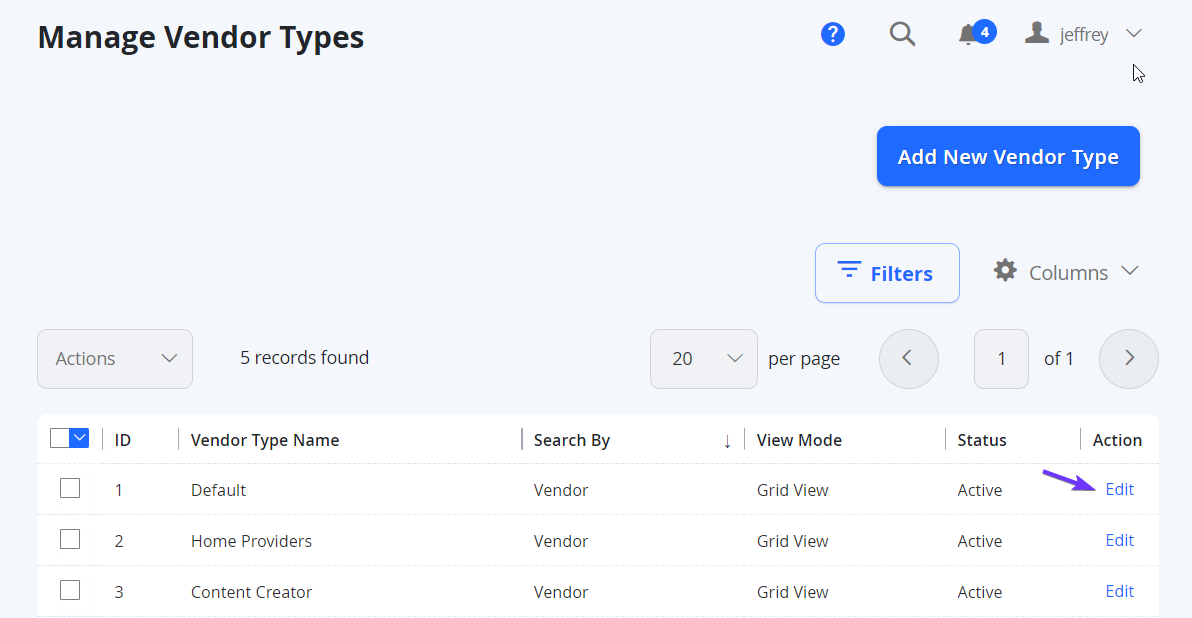
Navigate to the Vendor Type you wish to apply link the Subscription Plan to, by selecting Manage from the Vendor Types Grid.
-
Scroll down to the Assign User Roles and Subscription Plan section.
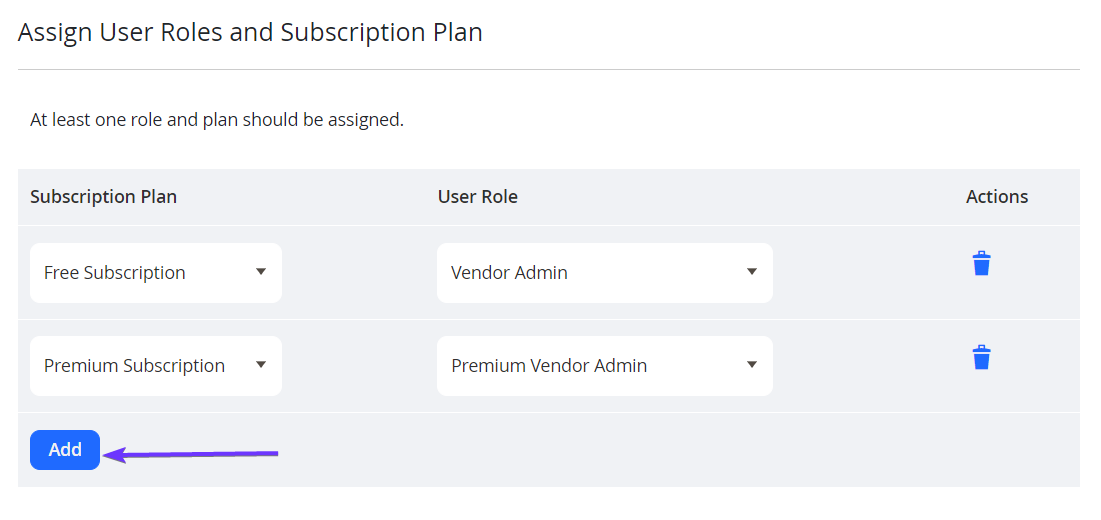
Select Add to create another row, where you can use the dropdown on the left to select the Subscription Plan, and select a User Role to accompany the Plan for any Vendor signing up to this plan. Repeat as necessary for multiple assignments.