Updating from Stripe Connect v1 API to v2 API
Overview
With the update from Stripe discontinuing their Connect v1 API in August 2025, vendor KYC verification can no longer be completed unless you are using Stripe Connect v2. If your Marketplace is still using the v1 API from Stripe, this will need to be configured to use the v2 API, which is already a feature we have in our v5.0.0 version.
NOTE: If your Marketplace was updated / launched to our v5 version this year, Stripe Connect v2 is already available. You need to ensure this version is being used for KYC. Please reach out to your support / project manager from Ultra Commerce if you need help verifying this, or follow the steps below to check your Marketplace configurations"
NOTE: After verifying your configurations, if you are still using Stripe Connect V1 and prefer Ultra Commerce to update this for you in your Stripe Account instead, please provide Stripe Administrator access to:
Team member email: UC Support team (email to be provided by request)
Team member role: Administrator (can be removed after configuration and testing).
There are 3 things that will need to be updated:
- Setting Use V2 Connect API to Yes in the Admin Portal Configuration.
- Adding the Stripe API Secret Key in the Admin Portal Configuration for Omnyfy > Stripe Config.
- Updating the OAuth URI Redirect to include the website ID.
Marketplace Configuration changes in the Admin Portal
There are 2 fields which have been added to the Marketplace Configurations specifically for v2 API with Stripe Connect (this can be found in Marketpalce Admin Portal under Stores > Settings > Configurations > Omnyfy > Stripe Config).
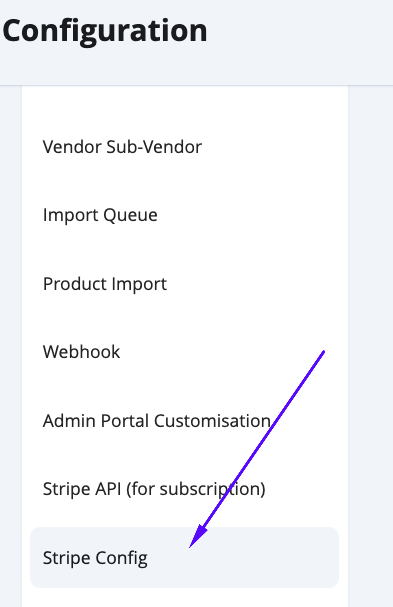
From here, you will see 2 additions:
- Use V2 connect API - Set this to Yes
- Stripe API key - This is your Stripe API Secret Key. Obtain this Secret Key from your Stripe Account (see next section).
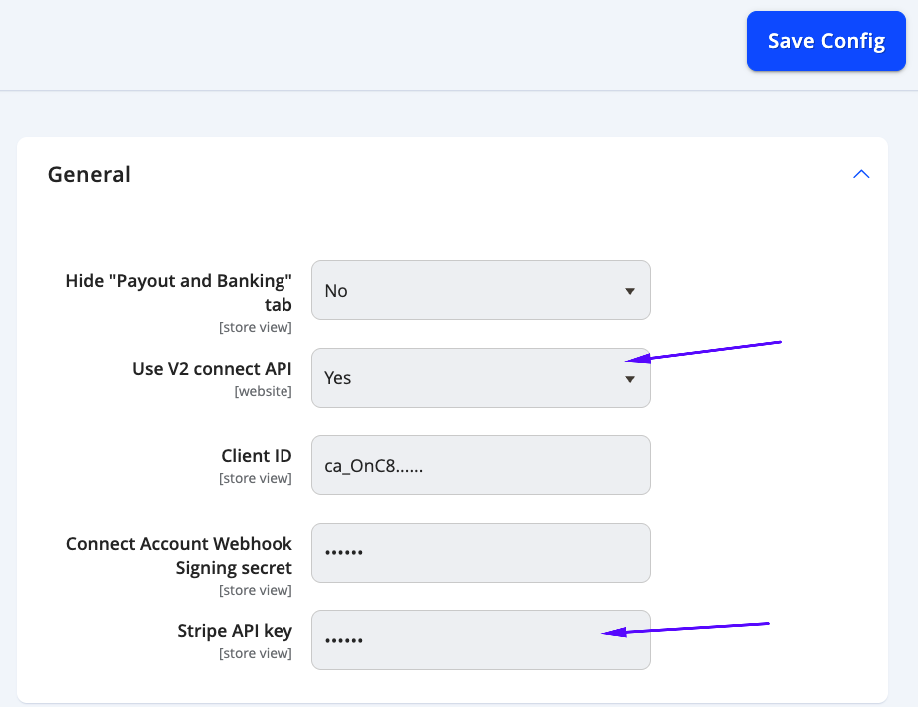
The other fields should remain the same.
Obtaining Stripe API Secret Key from your Stripe Account
If you wish to obtain and update the configuration from your Stripe Account yourself, you can follow the steps below.
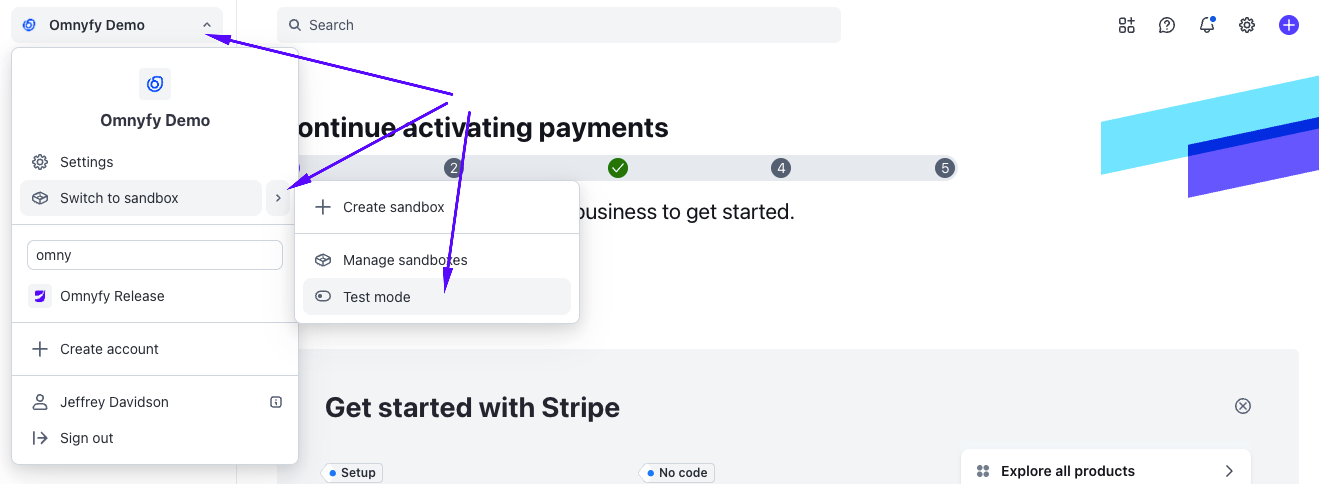
**NOTE: **Typically you would want to test this on your staging / test environment first before configuring on the live site. Ensure you are selecting Test Mode (or are in the correct Stripe account) to ensure that you have the correct environment API for your staging site. You can check the Client ID in the next step to ensure that it matches so that you can confirm you are using the correct Stripe account for it.
From your Stripe Dashboard, select Developers at the bottom of your menu on the left navigation. Then select API keys from the tabs at the top of the Developers page.
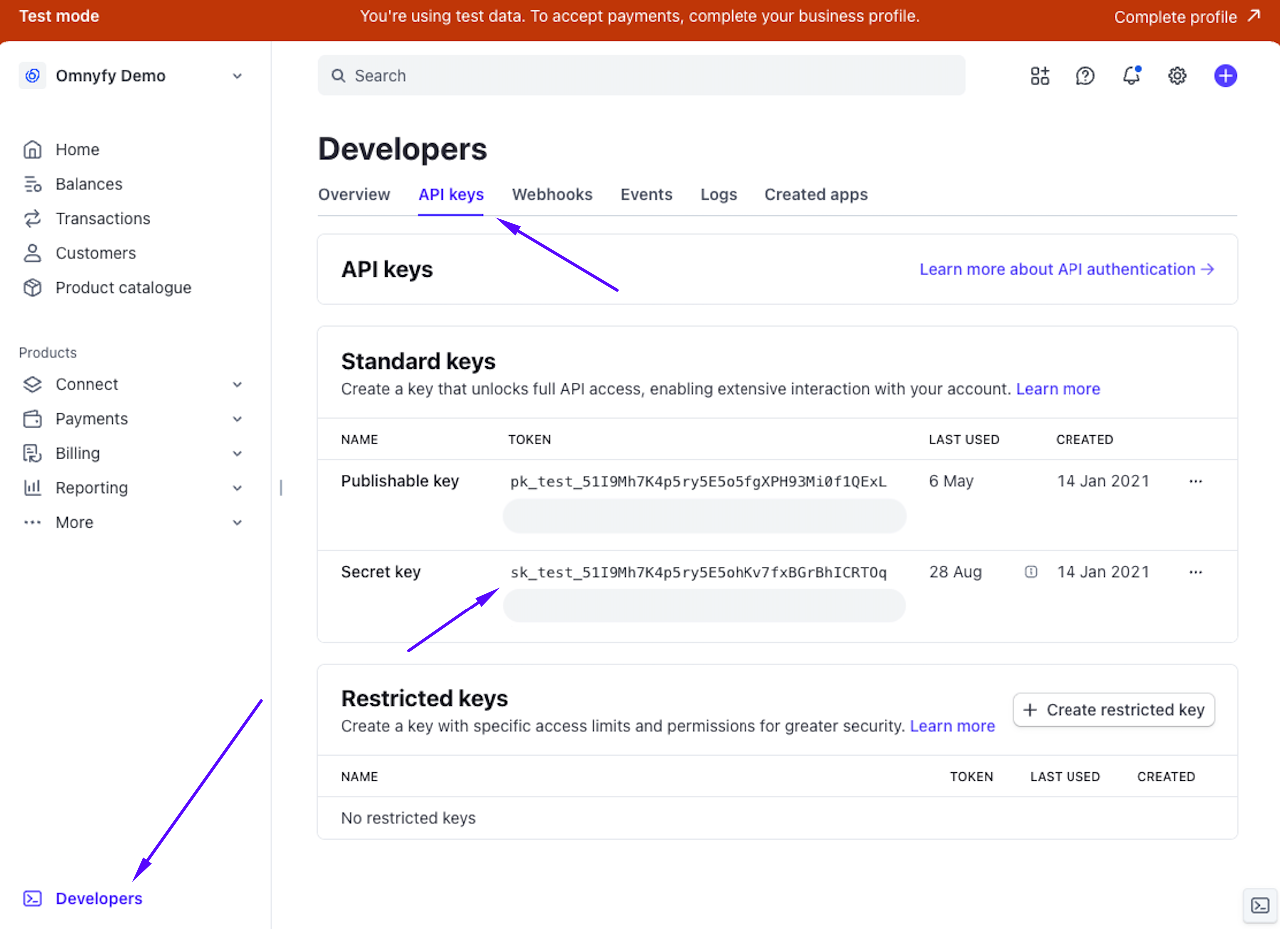
Here you can see the Secret Key field. This is what you will need to place in the configuration of the Marketplace. You can click on the key to copy the entire value.
Updating the URI Redirect in the Stripe Dashboard
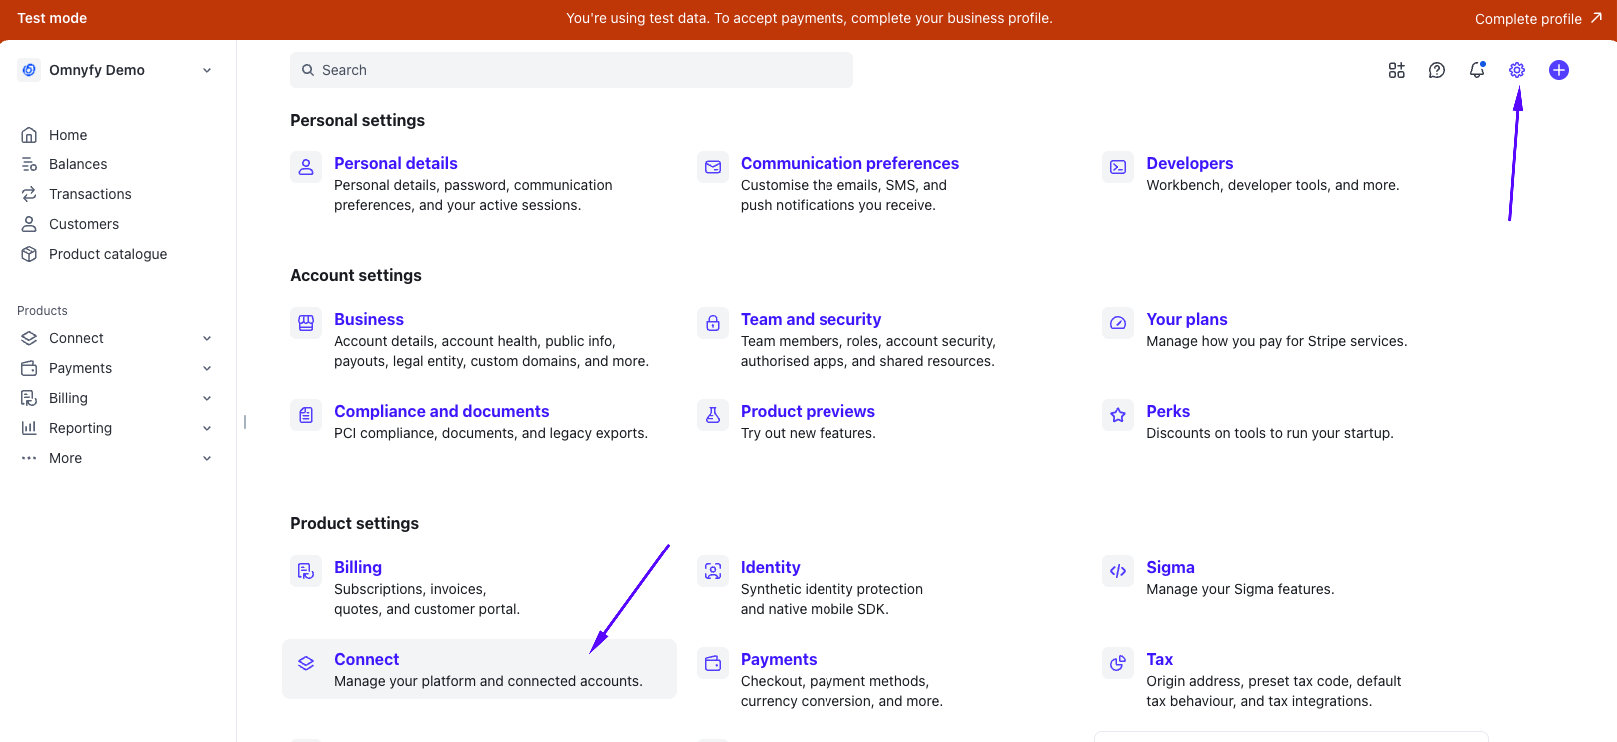
From your Stripe Account Dashboard, you can navigate to the Settings icon from the top right of the page, then selecting Product Settings > Connect at the bottom section.
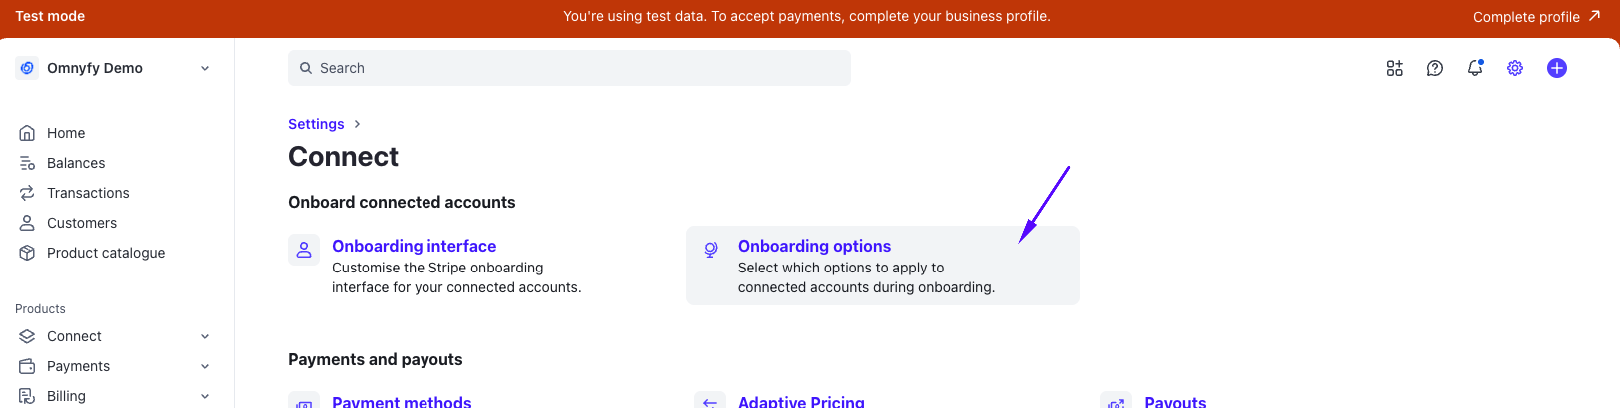
This will take you to the Connect page, where you will be able to select Onboarding options.
Once inside the Onboarding options page, select the OAuth tab from the top of the page. This will also load your Client ID - which you can use to compare with the settings in the Marketplace Admin Portal (Stores > Settings > Configurations > Omnyfy > Stripe Config)
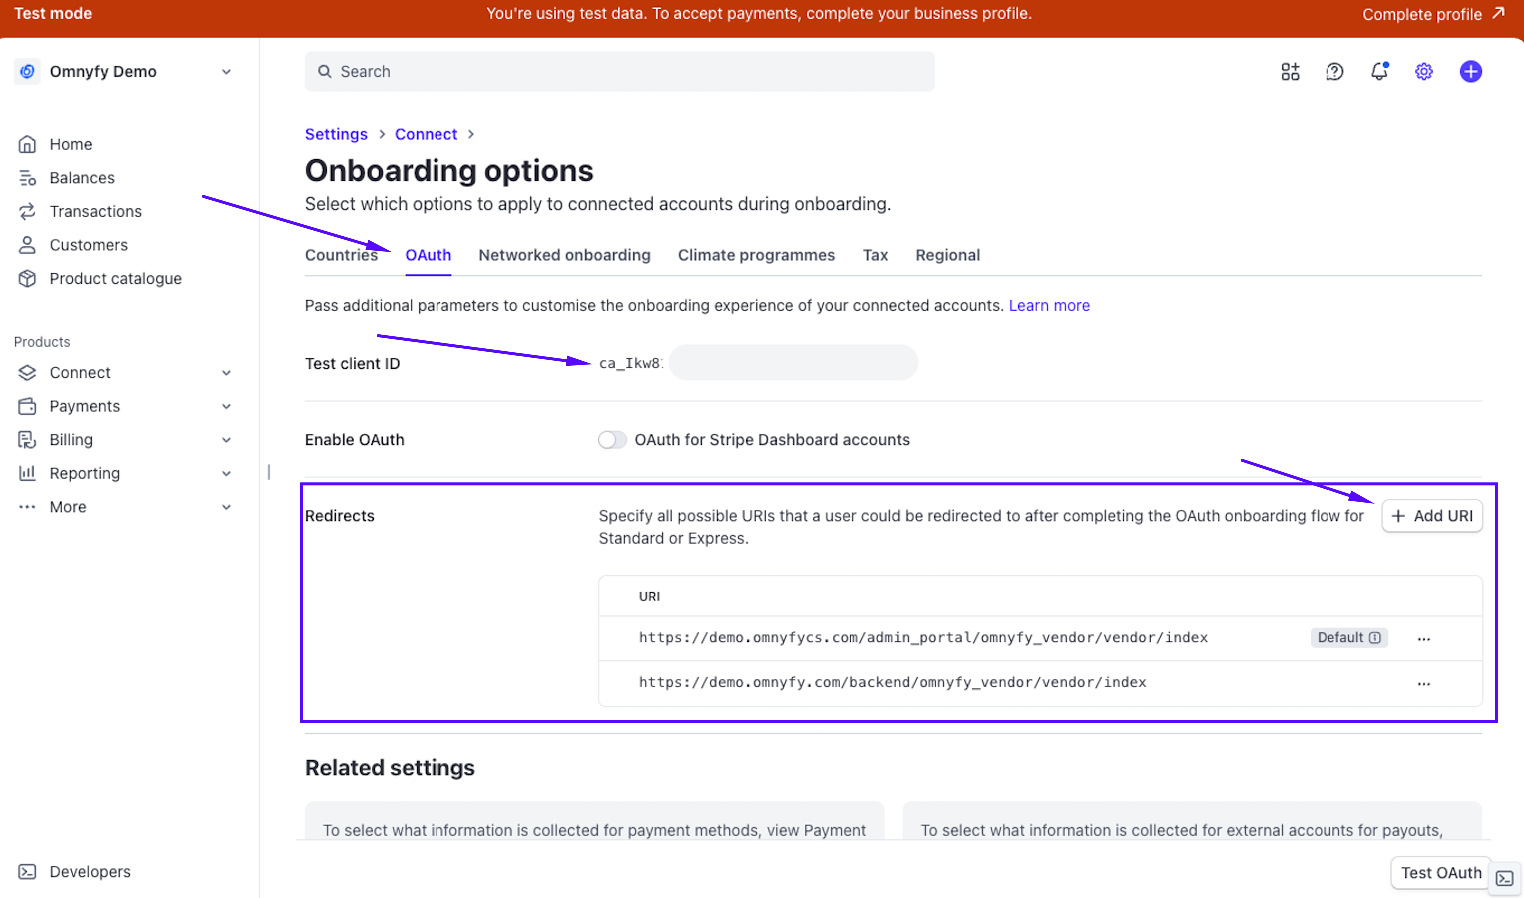
Here you will want to add a new URI (you cannot edit existing URI) to redirect your Vendors. Select Add URI button from the top right of the Redirects section.
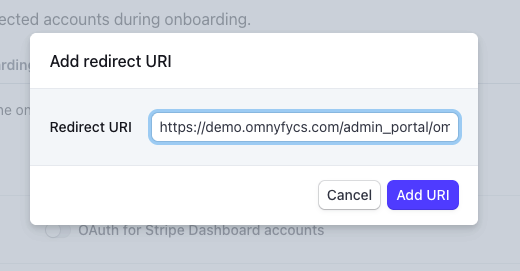
Your new URI will be the same as your previous URI, however there will now need to be a parameter at the end. You can copy the previous URI and paste it in the new URI if it's easier.
/website/{id}The URL should include the above text with the ID being switched over to the number associated with your Website ID from the Marketplace.
Here is an example URI.
Old URI: https://demo.omnyfycs.com/admin_portal/omnyfy_vendor/vendor/index
New URI: https://demo.omnyfycs.com/admin_portal/omnyfy_vendor/vendor/index/website/1
You will notice that there is the only difference is the /website/1.

Obtaining your Website ID
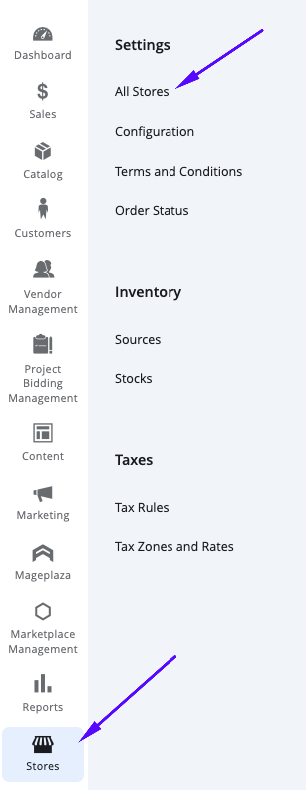
Typically, most marketplaces are only using 1 website - so the value will most likely be 1 in place of the id in your URI redirect. If you wanted to triple check what the ID was for your Marketplace (in case you have a different set up / have multiple websites in your Admin Portal), you can navigate to Stores > Settings > All Stores.
Here you will see a list available websites for your Marketplace.
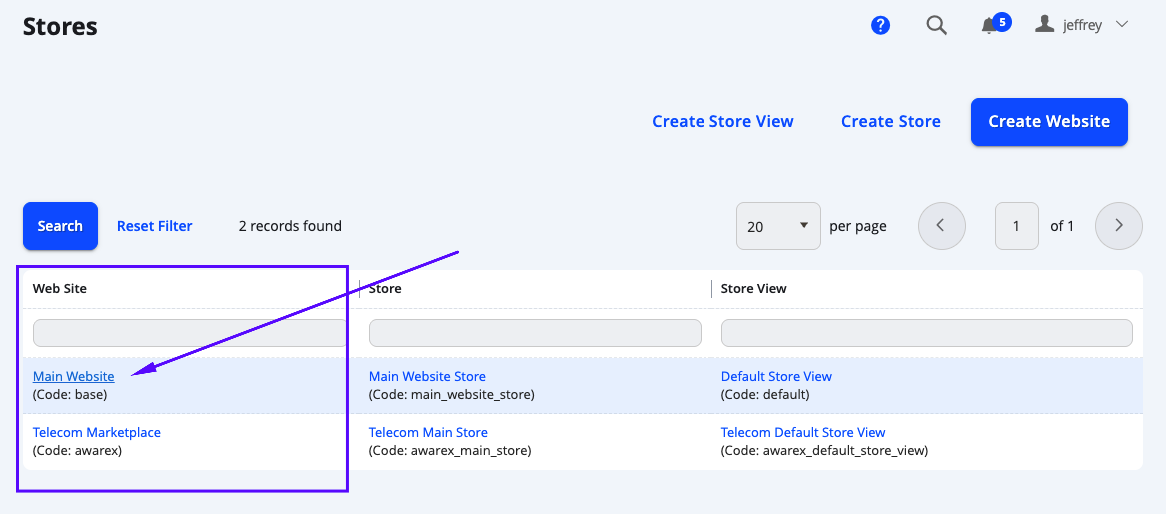
Click on the website you are configuring for to open up the page. You can check for the ID in the URL of the page you open.
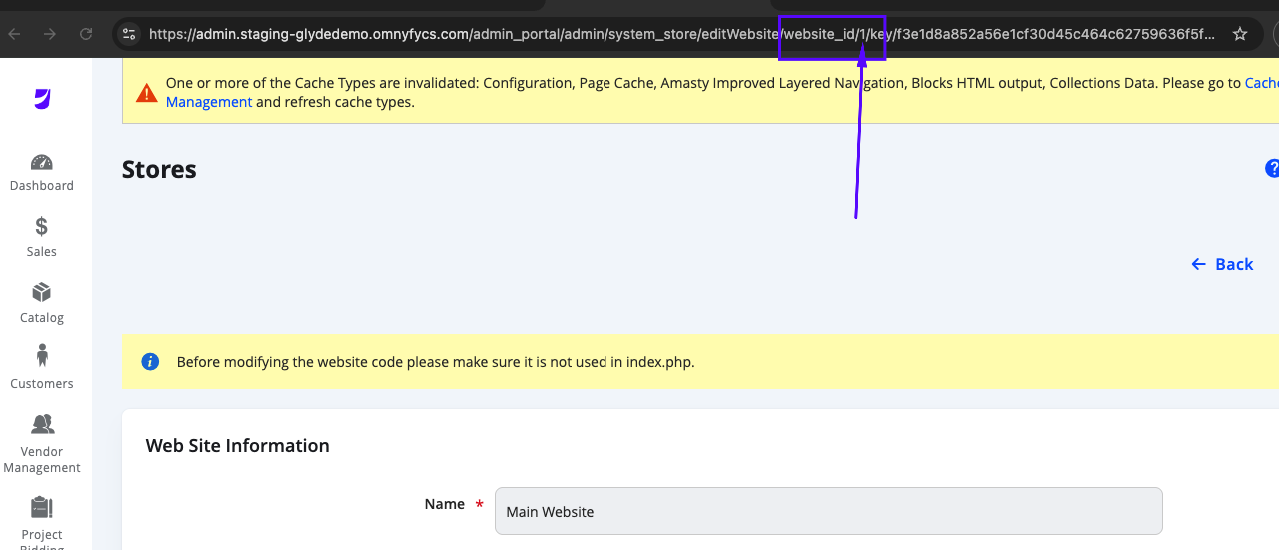
In this case, the website ID is 1. This is the number that you will need to add to the end of /website/ in your URI redirect from your Stripe Dashboard in Settings > Stripe Connect > Onboarding Options > OAuth > Redirects.