Configuring Payouts with Stripe Connect
The Marketplace platform uses Stripe Connect for paying out vendors for orders by default. If you are using this feature, this will need to be configured in Stripe and in the Admin Portal.
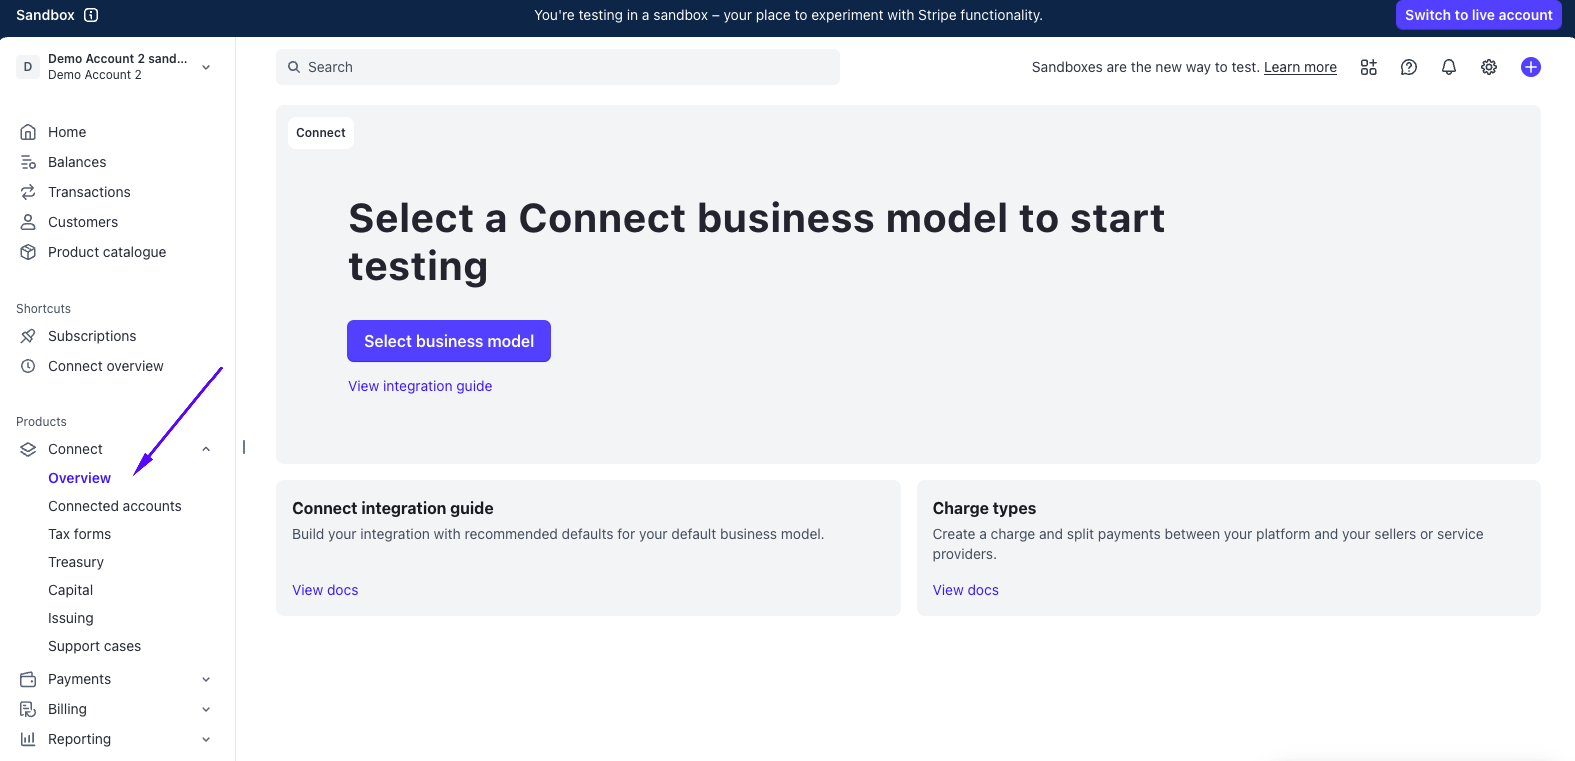
Selecting a Connect Business Model
From Stripe, navigate to Products > Connect > Overview. Here you can select a business model.
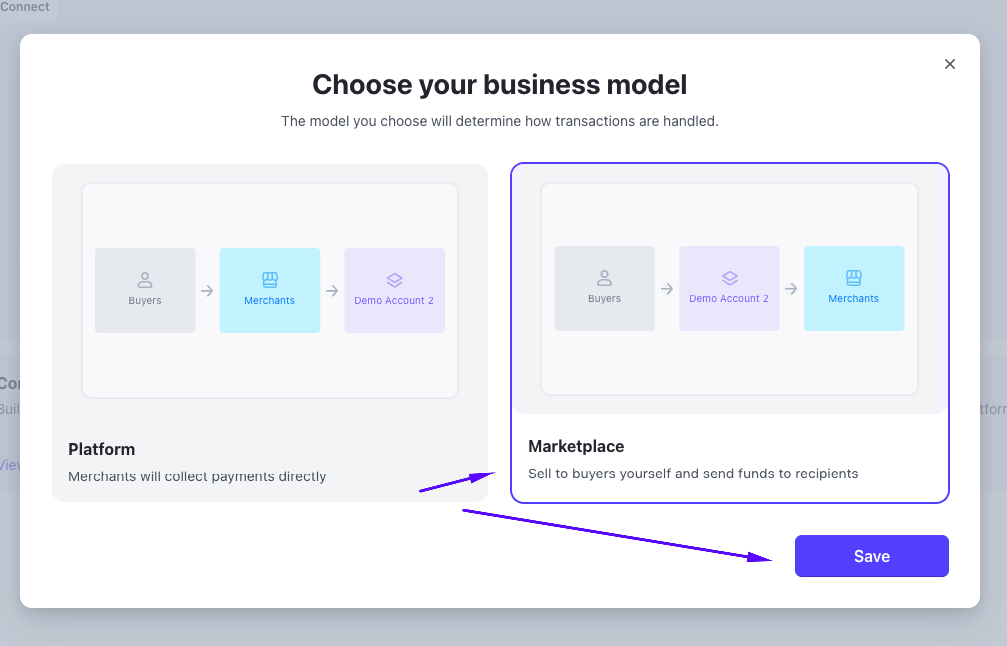
A pop up will appear, where you can select Platform or Marketplace. Select Marketplace and then Save on the bottom right.
Configuring Stripe Connect Onboarding Options
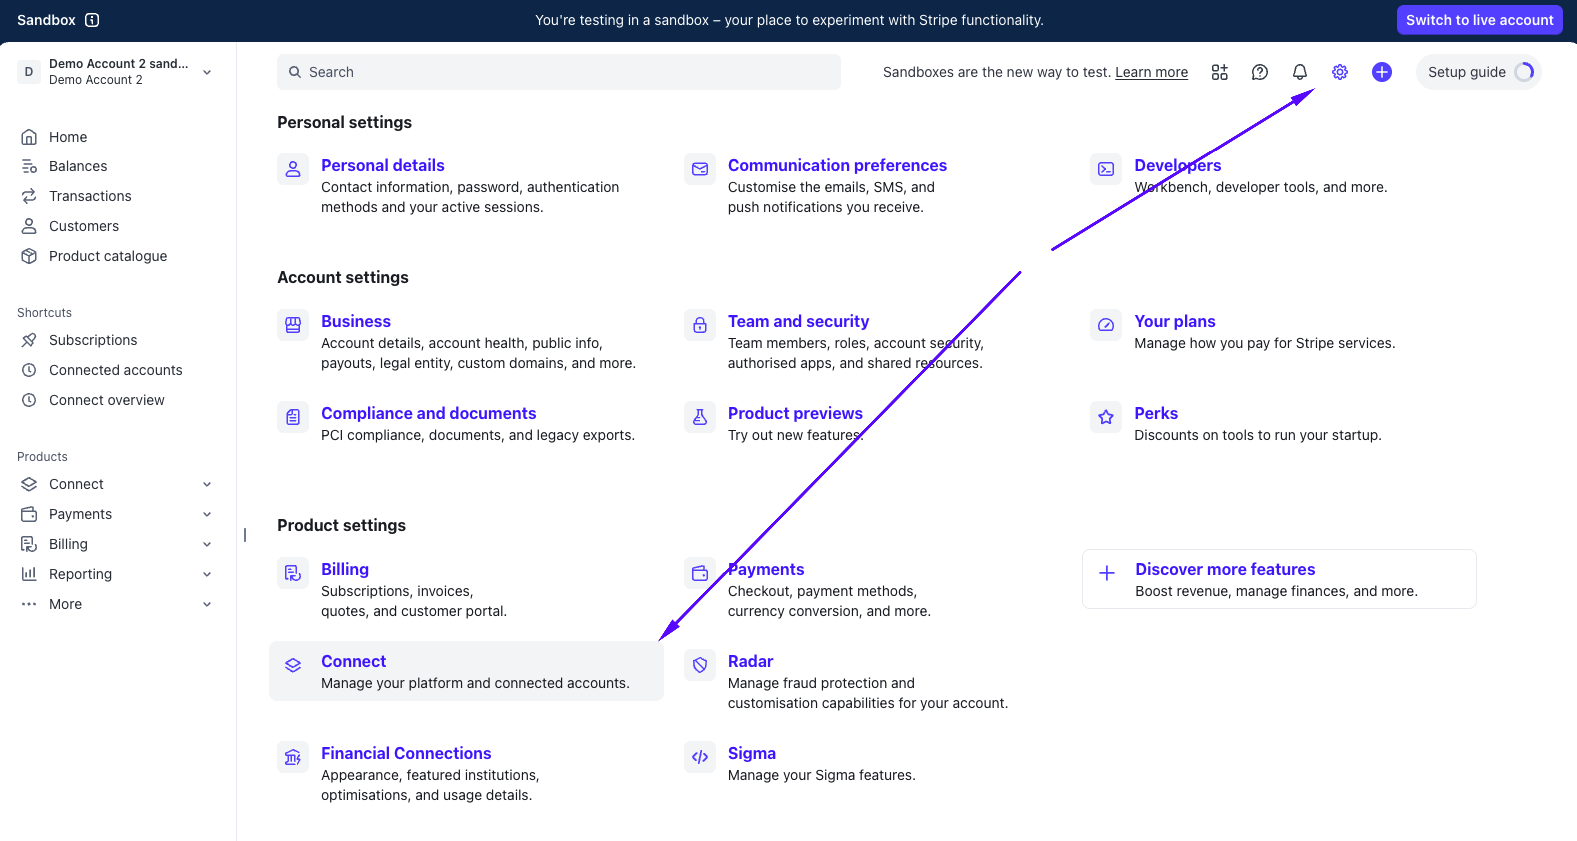
On the next step, select Settings from the top right (the cog wheel icon), and under Product settings, navigate to Connect.
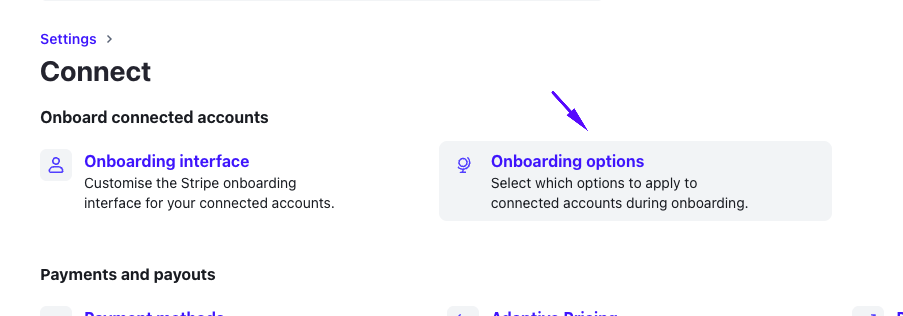
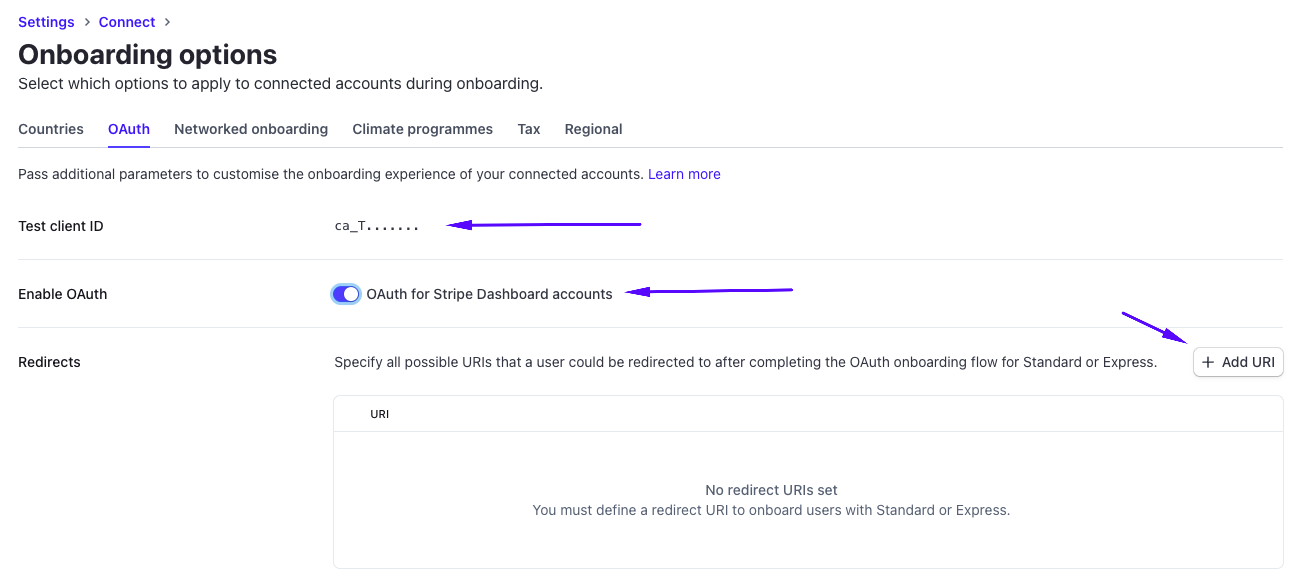
From the Settings > Connect section, select Onboard connected accounts > Onboarding options.
From here, select the OAuth tab, and configure the following:
- Client ID: You will need to copy this for the Marketplace Admin Portal. This will be labelled as Test client ID if you are in Sandbox Mode.
- Enable OAuth: Ensure this is enabled.
- Redirects: Select + Add URI to add a redirect.
A pop up will appear, and you can insert the URI here.
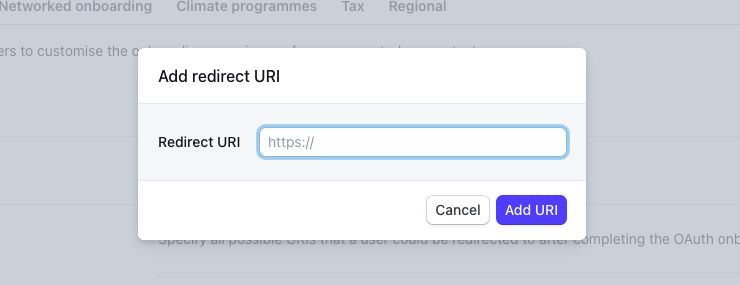
Add the URL for your marketplace admin portal in this format:
http(s)://{admin-project-host}/{admin_url}/omnyfy_vendor/vendor/index/website/{website_id}EG:
Main website URL: https://www.marketplacedemo.com/
Admin URL: https://admin.marketplacedemo.com/admin_portal
The redirect URL will be https://admin.marketplacedemo.com/admin_portal/omnyfy_vendor/vendor/index/website/1 and will be the URL where vendors will be redirected to after they sign up to KYC. Select Add URI to add.
NOTE:
Typically, the website ID will generally be "1", so you can just use the "/omnyfy_vendor/vendor/index/website/1" URL.
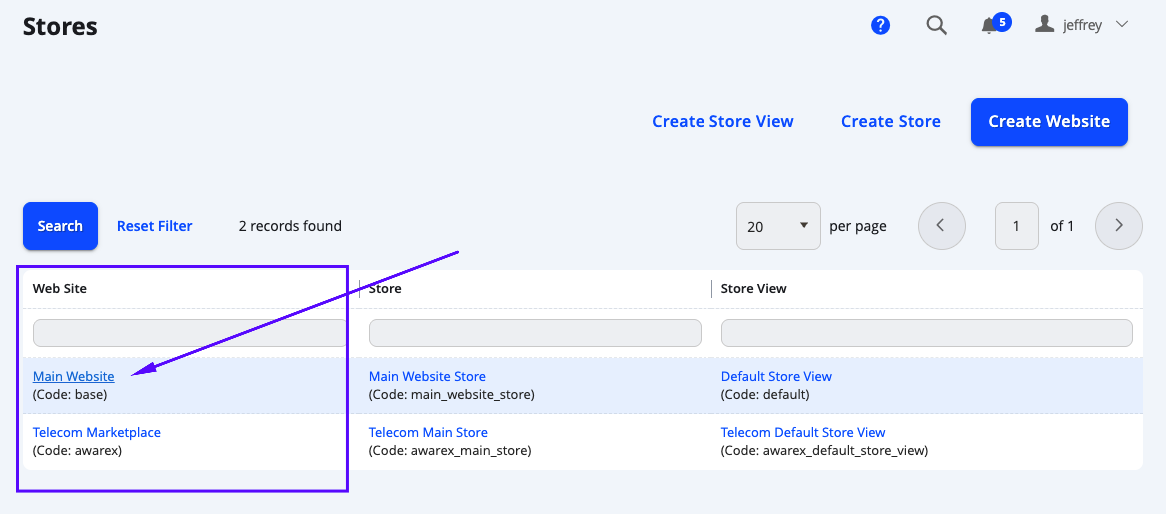
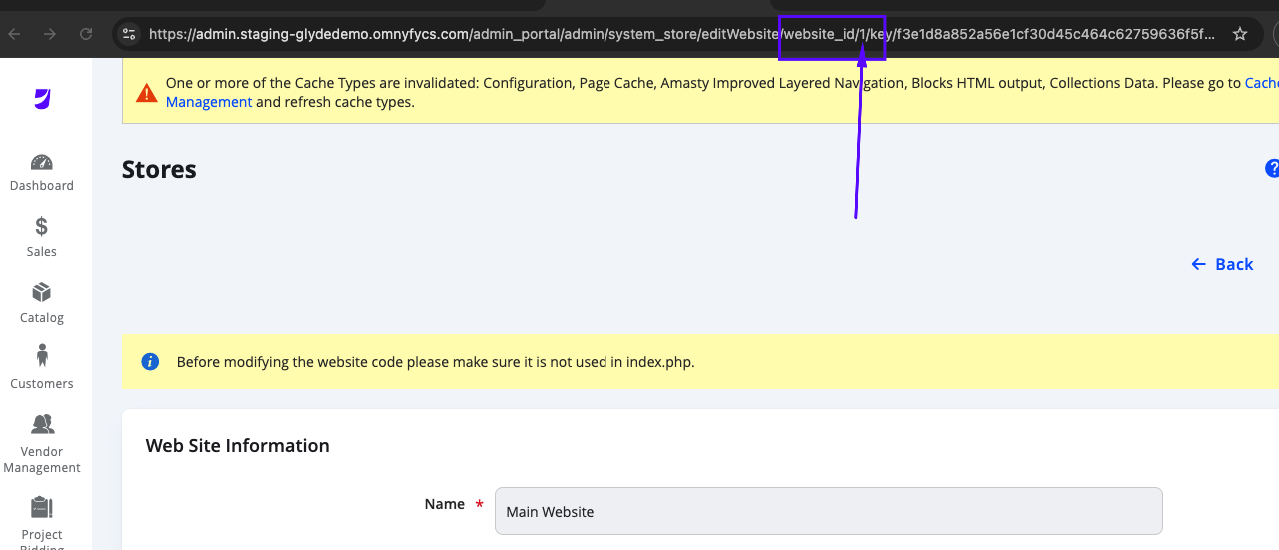
However, if your Marketplace contains multiple Websites, then this will be depending on which website you are configuring this Stripe account for. You can consult with our UC team to confirm your Website ID, or you can find it in Stores > Settings > All Stores, and then selecting the specific Website and finding the ID through the URL.
Configuring the Admin Portal with Stripe KYC
From the Admin Portal, navigate to Stores > Settings > Configuration > Omnyfy > Stripe Config.
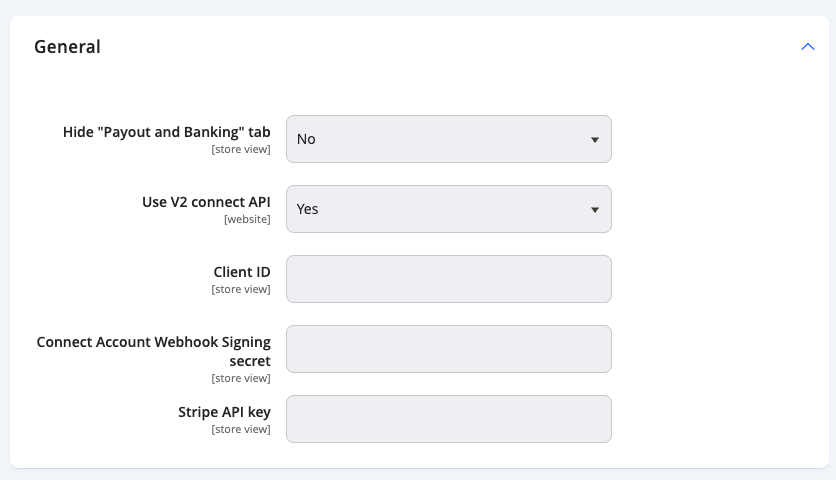
| Field Name | Description |
|---|---|
| Hide "Payout and Banking" tab | Select No when using Stripe for KYC payouts. |
| Use V2 connect API | Set this to Yes. |
| Client ID | Use the Client ID (or Test Client ID) from the Stripe Connect OAuth settings. |
| Connect Account Webhook Signing secret | This can be obtained when you set up the Webhook (next step). |
| Stripe API Key | This is the Stripe Secret Key from Developers > API Keys. 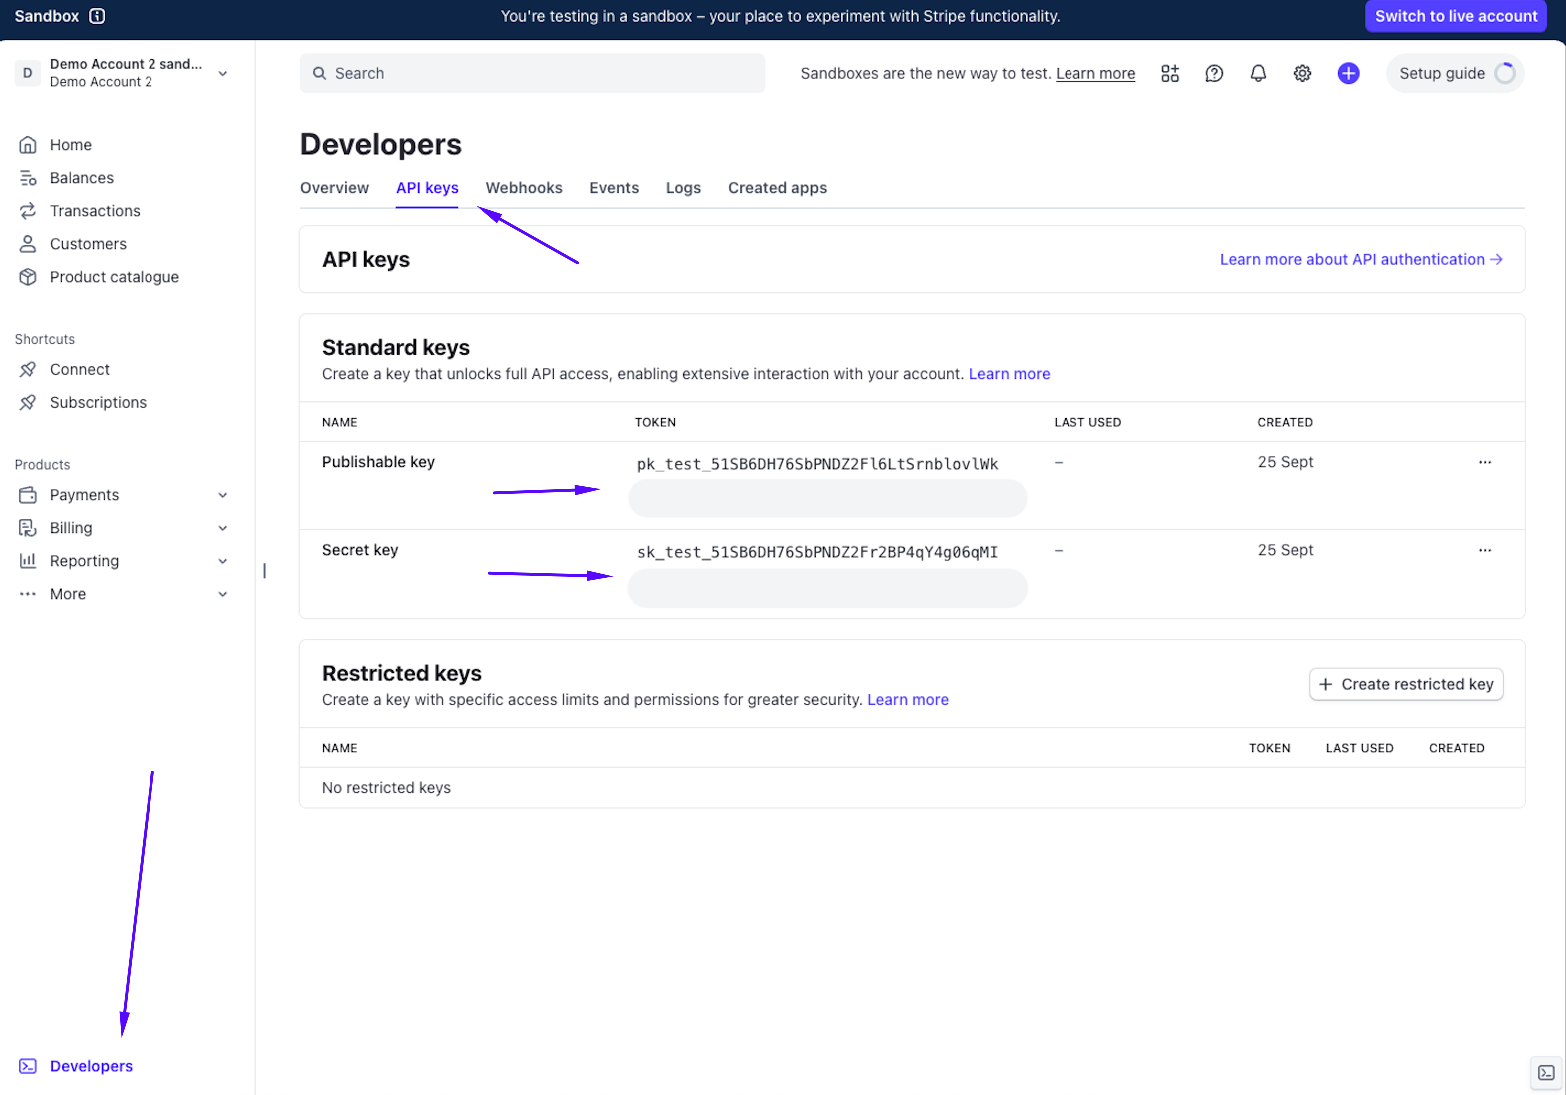 Copy the Secret Key and paste it here. |
Select Save Config when completed.