Vendor Attributes
Vendor attributes are the characteristics or parameters of a determined vendor. The Marketplace Owner manages these attributes to control and determine what information is needed for the vendors, such as vendor name or address. These attributes can be grouped into attribute sets.
There are default attributes created for the Vendors, however you can create as many new attributes as needed to define different vendors / vendor types.
Click here to get an understanding of how attributes are used in the Marketplace
NOTE:Attributes must be in the required Attribute Sets in order to apply to the relevant Vendor Types.
Managing the Vendor Attributes
Only Marketplace Owners can create and edit the attributes in the Admin Portal.
-
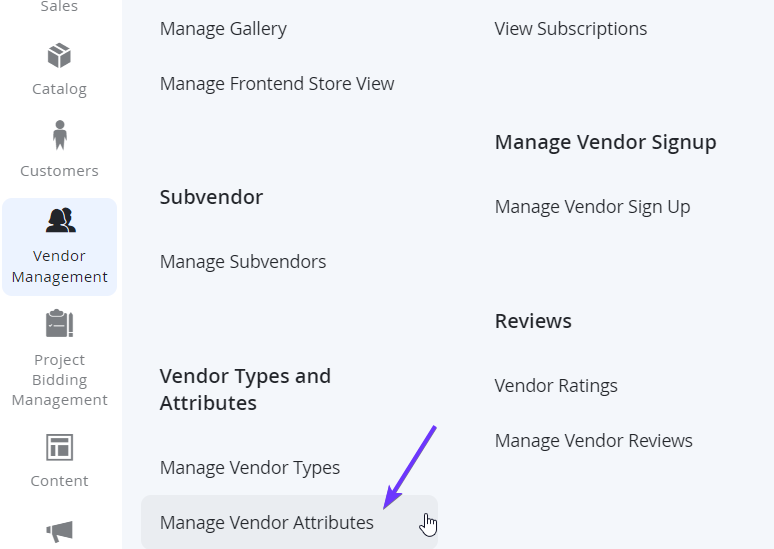
As a Marketplace Owner, log in to the Admin Portal and navigate to Vendor Management > Vendor Types and Attributes > Manage Vendor Attributes.
-
This will display all vendor attributes available to edit through the Admin Portal. You can simply click on any of the attributes to view its details.
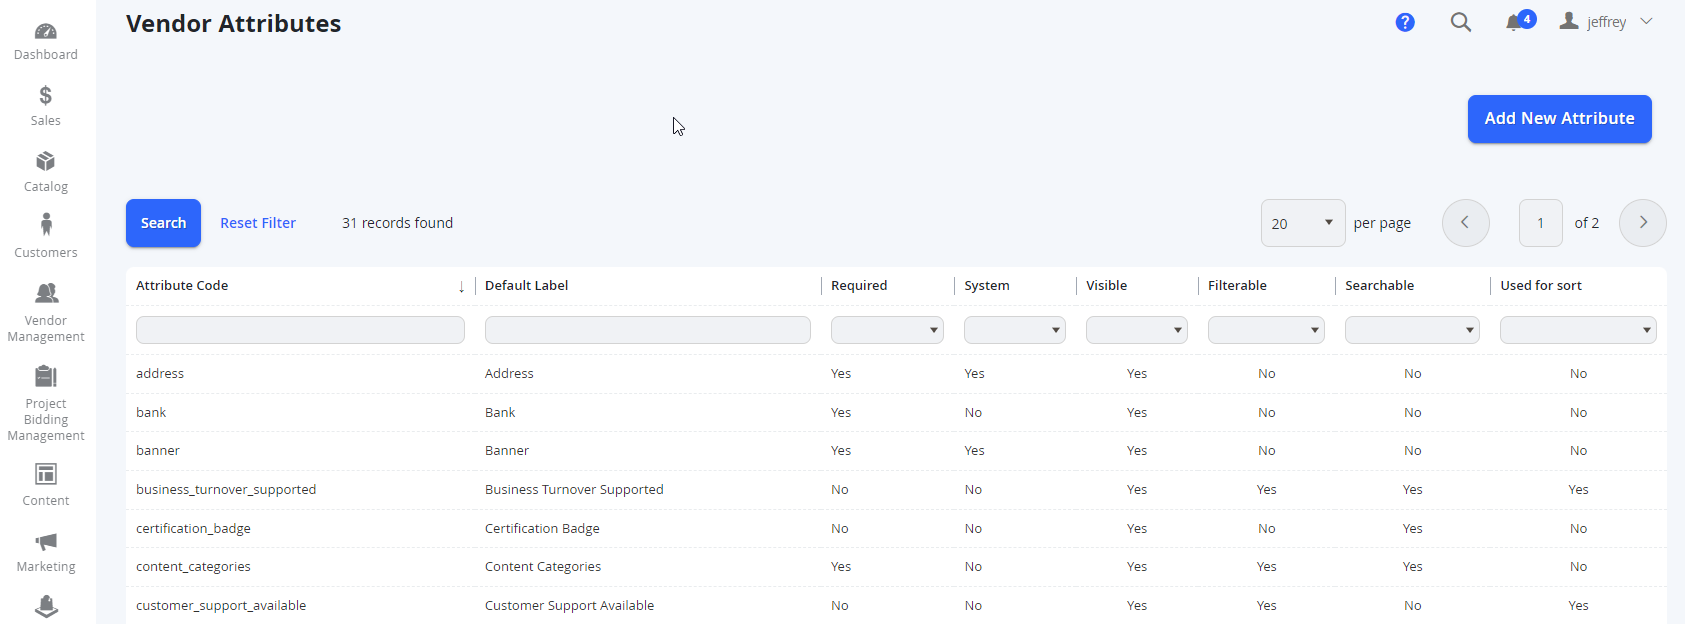
There are some overview information on this grid which may be helpful to read through
| Field | Notes |
|---|---|
| Attribute Code | This is a unique code (most of the time copied from the Label) which the website will reference in templates and is used for back end purposes. |
| Default Label | This is the default name of the attribute. |
| Required | This shows if the field is mandatory when populated. |
| System | This dictates if the attribute was created by the system (eg out of the box) by default, or if it is a custom field. |
| Visible | This dictates if the attribute is visible in the front end (to customers or vendors). |
| Filterable | This dictates if the attribute is able to be filtered on the vendor directory front end. |
| Searchable | This can be ignored for now. |
| Used to Sort | This can be ignored for now with default to No. |
Creating New Vendor Attributes
- From the Vendor Attributes Grid, select Create New Attribute from the top of the page.

- Once the page loads, there will be 3 tabs on the left, with the content displaying on the right.
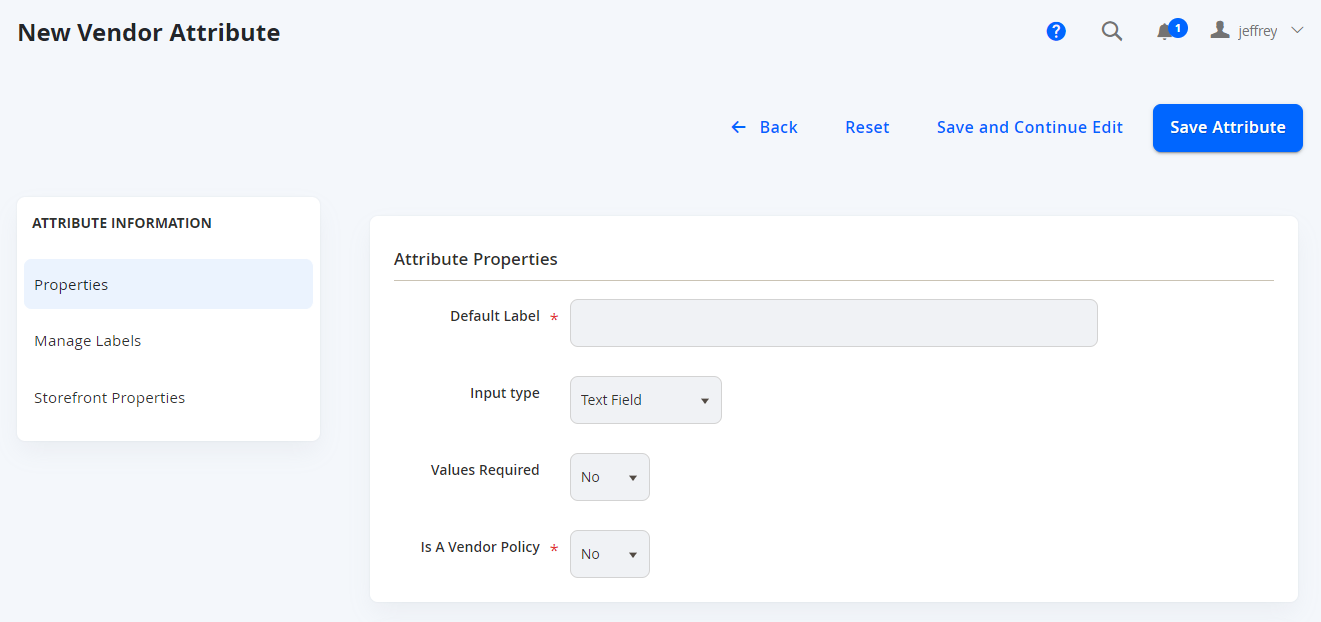
Let's start with the first tab.
Properties
This is broken down in to 2-3 sections depending on the input type.
Attribute Properties
| Field | Notes |
|---|---|
| Default Label | This is the default name of the attribute. This is also displayed on the vendor attribute grid in the Admin Portal. |
| Input Type | This determines how the field will populated. Note that once saved, this cannot be edited. 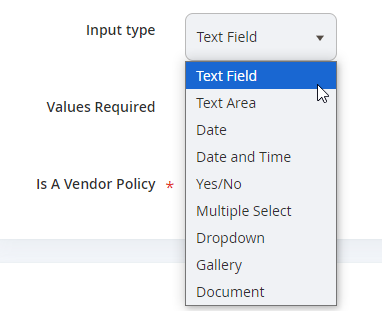
|
| Values Required | This dictates if the attribute is mandatory to be populated. |
| Is a Vendor Policy | If the attribute is a policy, this will appear in the designated spot where all other policies are displayed on the Vendor Page Front End. |
Manage Options
This allows Marketplace Owners to manage pre-created selections for users.
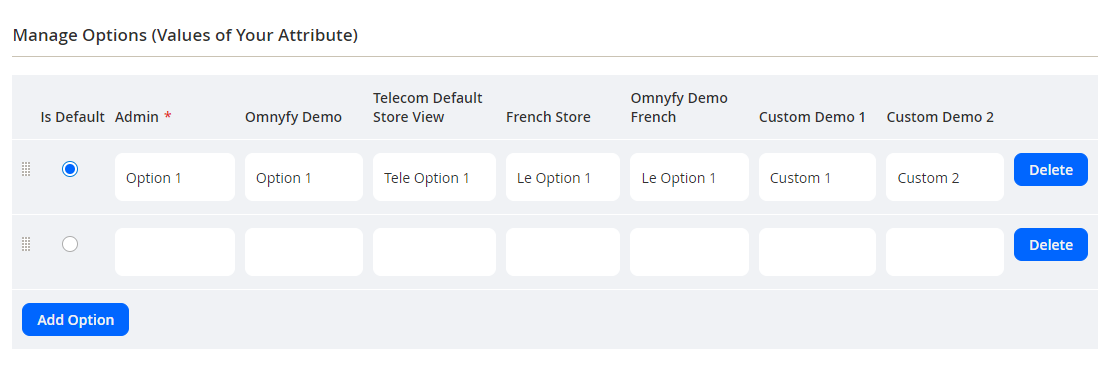
Only applicable when using Multiple Select or Dropdown as the Input Type.
Is Default: You can select one of the options as the default option if necessary.
Admin: This will be the label of the option by default and used in the back end.
Websites: The following columns will be how you can alter each option label on the front end, for each website store view. You can leave these blank if you would like to use the same label as Admin.
Delete: This deletes the option.
Add Option: This adds another option. Note that if you have an option with no values in Admin, it must be deleted before saving, or it will consider the required field empty since the Admin value is mandatory.
Advanced Attribute Properties

| Field | Notes |
|---|---|
| Attribute Code | Leave this blank, as the system can generate an internal code based on the default label. Alternatively for advanced users, you can input a custom code if required. THIS MUST BE UNIQUE |
| Scope: | This dictates at what level in your marketplace the attribute can use the same value. Primarily used for Multi-Store Marketplaces. Setting this to Global will allow the attribute to be applied to current and all future websites and store views. |
| Default Value: | This will only apply to Text Field, Text Area, Date, and Yes/No. This |
| Unique Value | To prevent duplicated values choose Yes. If the attribute can have duplicate values (default) choose No. |
| Input Validation for Store Owner | To insert a validity test into a text field. Example: email, letters, numbers. |
| Add to Column Options | Select Yesto add this attribute to the list of column options in the Vendor Profile and Vendor Storefront grid in the Admin Portal. It is recommended to set this to No, as the grids may get cluttered, unless required on the grid view. |
| Use in Filter Options | Select Yesto add this attribute to the list of filter options in the Vendor Profile and Vendor Storefront grid in the Admin Portal. It is recommended to set this to No, as the grids may get cluttered, unless required on the filters. |
Manage Labels - OPTIONAL
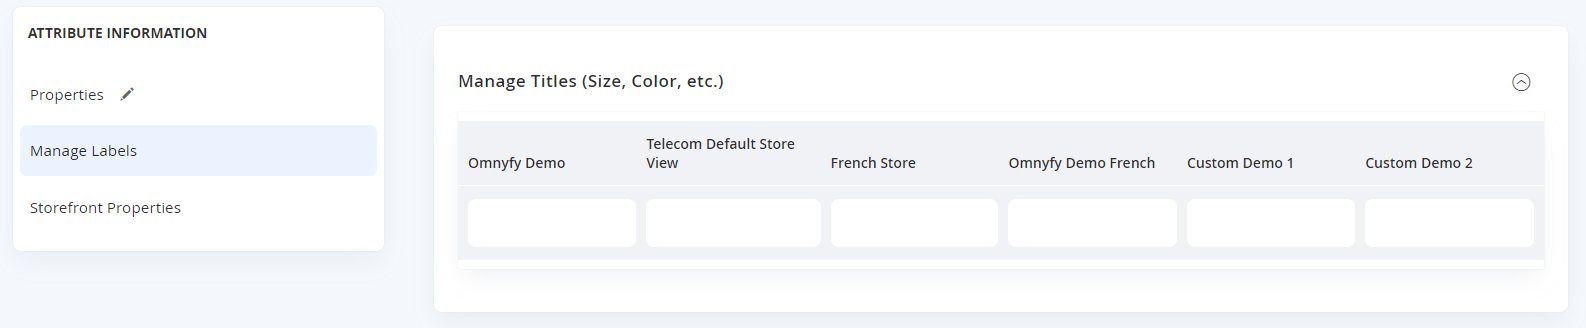
If you have more than one website using the vendor attribute and want to define different attribute labels for each site, expand the Manage Labels sections and enter a title for each view. Leave blank by default if not required.
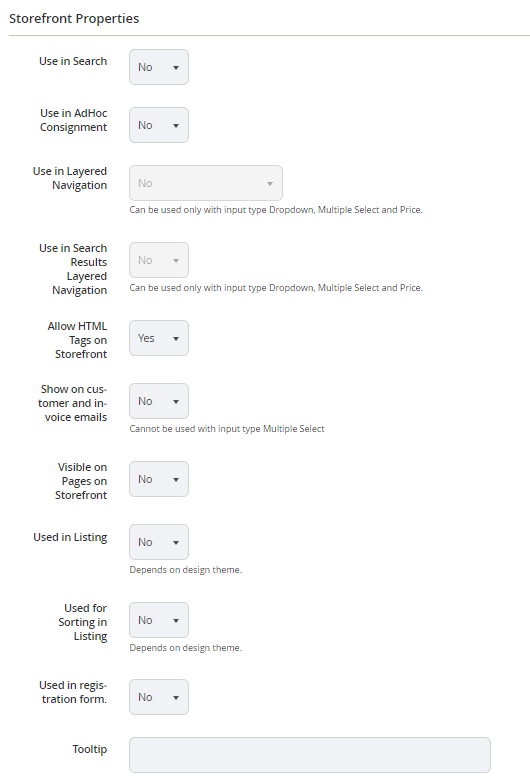
Storefront Properties
| Field | Notes |
|---|---|
| Use in Search | This field can be ignored for now. |
| Use in AdHoc Consignment | This field can be ignored for now. |
| Use in Layered Navigation | Choose Filterable (with results) to use only with results greater than zero. Choose Filterable (no results) for all values, whether the number of results is zero or greater. NOTE: |
| Use in Search Results Layered Navigation | Choose Yes to use the attribute in layered navigation on search results pages. NOTE: |
| Allow HTML Tags on Storefront | Choose Yes to allow the text to be formatted with HTML tags on the front end (if applicable). NOTE: |
| Show on customer and invoice emails | Choose Yes if you would like to show this attribute on customer order confirmation and customer invoice emails. NOTE: |
| Visible on Pages on Storefront | Choose Yes to include the attribute on the Vendor Profile page front end - for customers to see. |
| Used in Listing | Choose Yes to include the attribute in listings / search results page (if applicable). NOTE: |
| Used for Sorting in Listing | Choose Yes to use the attribute as a sort parameter for the Vendor Directory (if applicable). |
| Used in registration form | Choose Yes to include this attribute in the registration form when creating a new Vendor (must also be in the Vendor Attribute Set for the Vendor Type). |
| Tooltip | This is optional, and you can include a tooltip to add an explanation about the attribute for customers. |
Saving the Vendor Attribute
Once the attribute is populated with all the required data in the different tabs, you can choose 2 options when saving from the top of the page.

Save and Continue Edit: Allows you to make the changes, and remain on the same page after saving.
Save Attribute: Saves the attribute, then redirects you back to the Attribute Grid.