1. Vendor Sign Up Process
For open marketplaces, our Marketplace platform enables Vendors to sign up from the front-end of the site and includes an approval process for vendors. Marketplace owners can decide on whether or not to enable Vendors to signup to the marketplace from the front-end or whether the Vendor creation process is restricted only to marketplace administrators.
To determine if you need to enable Vendor Signup from the front-end, consider if you want your marketplace to be "Open" or "Closed".
Read more about the different Types of Marketplaces here.
NOTE:Open Marketplaces feature an approval process, so all requests to join the marketplace must be approved prior to the Vendor receiving access to the platform.
The Vendor Signup Process on the front-end
Linking to the Signup Page
Once you've created your Vendor Signup form using Vendor Attributes, along with the default sign up fields from the platform, you can then link the Vendor Sign up form to any text or button on your marketplace.
By default, the theme will generate a footer link for Vendor Signup. If not, you can also link to it through Content Blocks (depending how your front end is set)
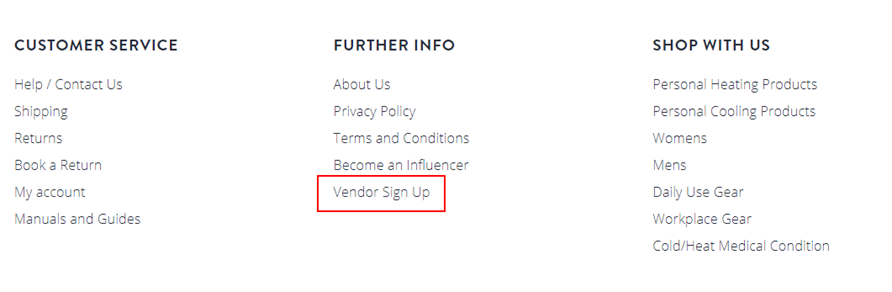
Note that if you have multiple Vendor Types and want to create different sign up pages for each Vendor Type, you will need to follow these instructions. You may also have different plans. See an example.
Completing the Sign up form
The Vendor Sign up form is a registration form that can feature custom fields alongside the default required fields for a Vendor to sign up to your marketplace.
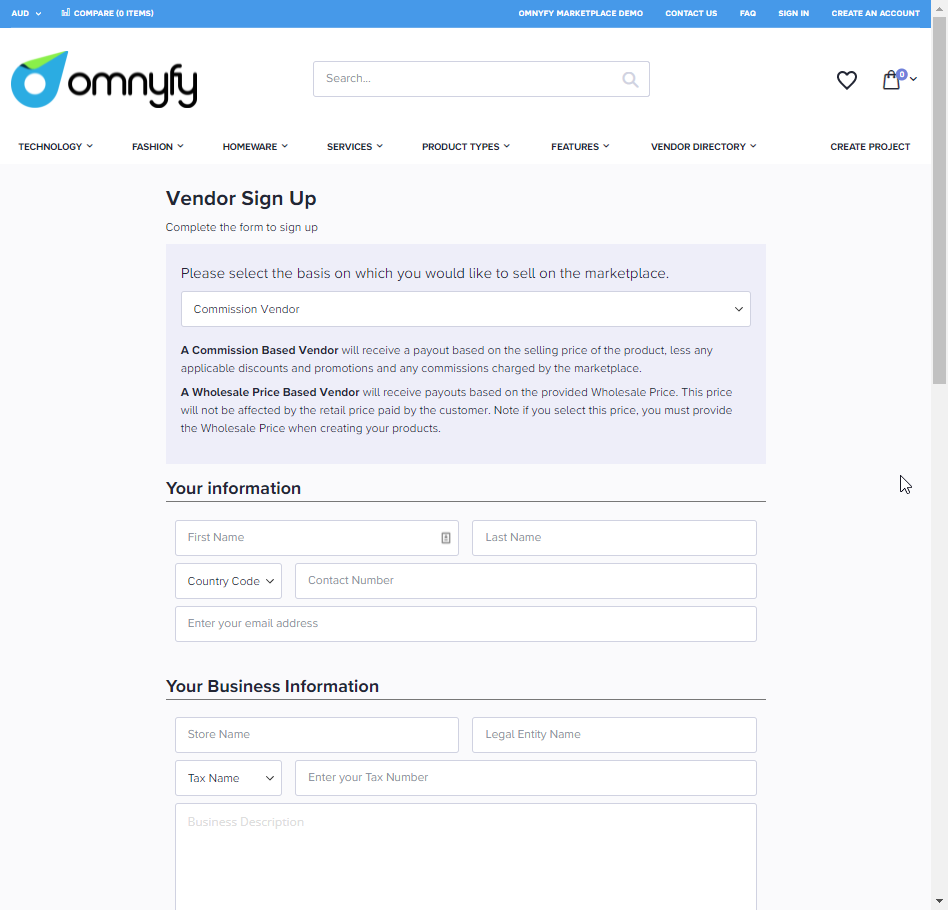
NOTE:The Commission / Wholesale section at the top of the form will only show if you enabled the wholesale feature on the front end of the platform.
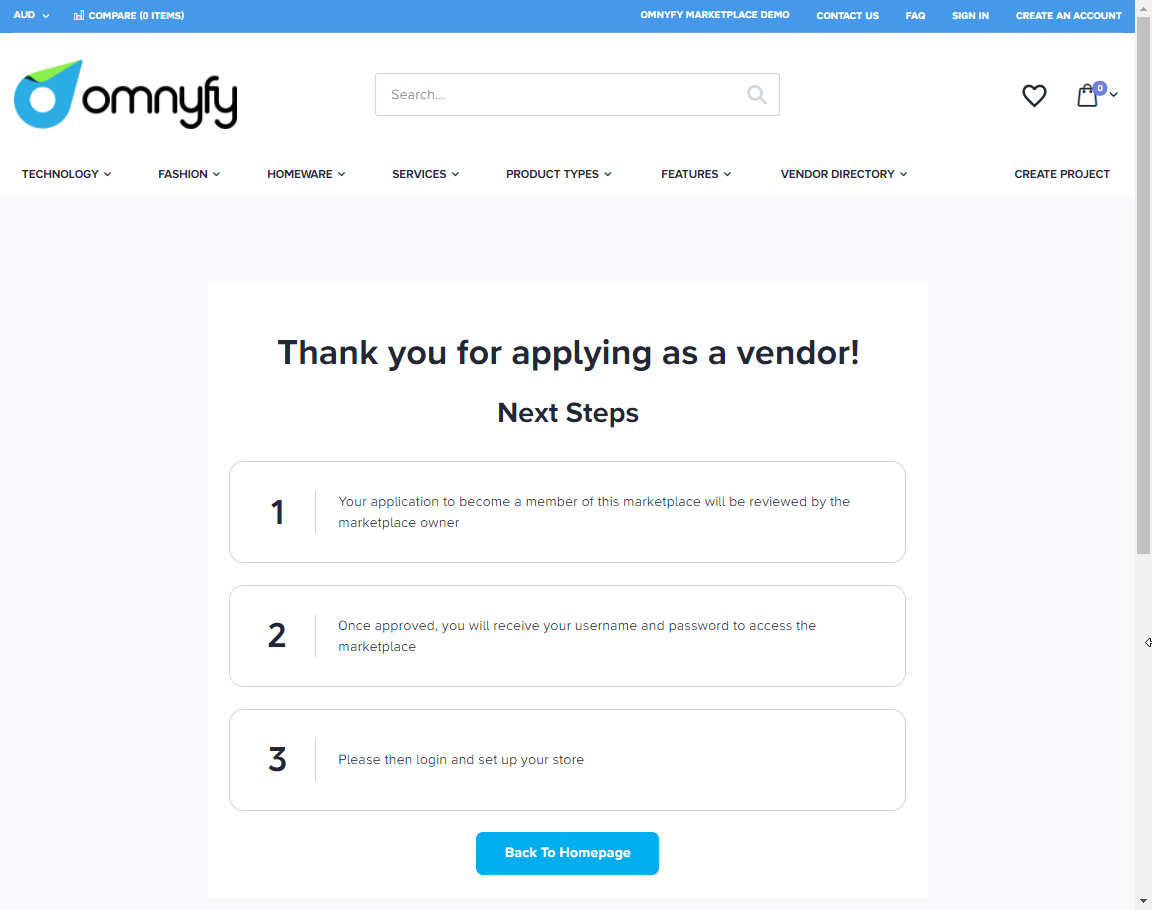
Once the vendor has populated the form, they are normally taken to a thank you page. You can see Example content for Vendor Signup Success Page here (---LINK HERE---).
Reviewing and Approving the new Vendor Signup Request
Once a new vendor has signed up, the Marketplace Owner will receive a notification of a new signup.
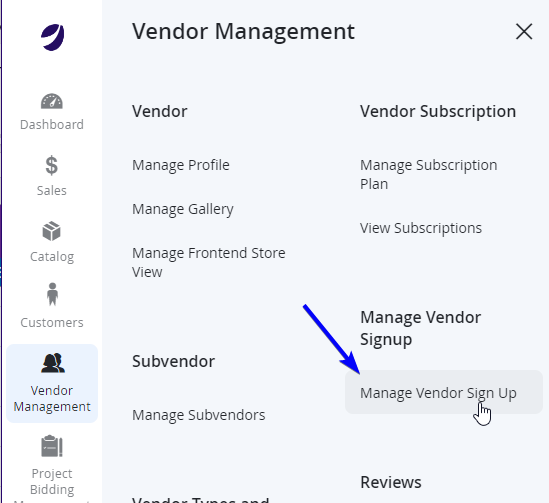
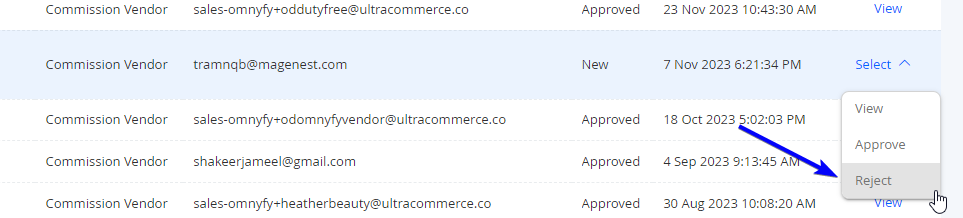
- Sign in to your Marketplace Admin account and navigate to Vendor Management > Vendor Sign Up > Manage Vendor Sign Up.
- The newly signed up Vendor will appear in the table view with Status as New.
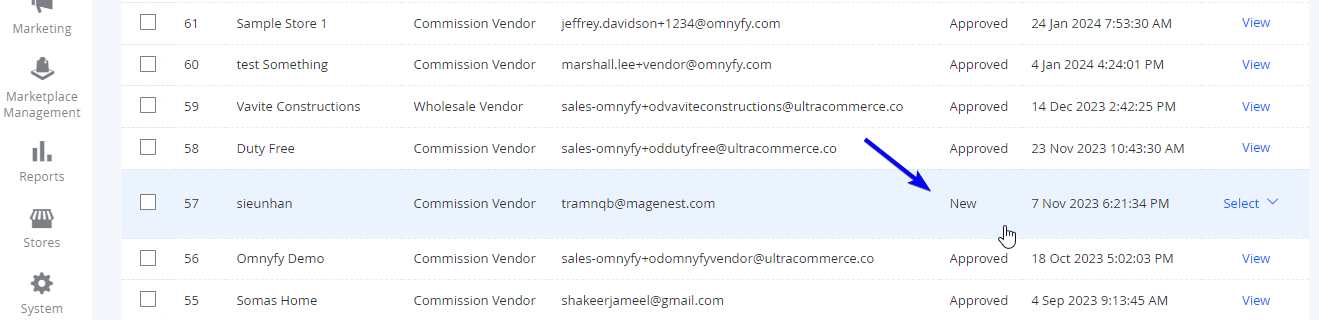
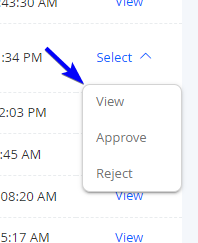
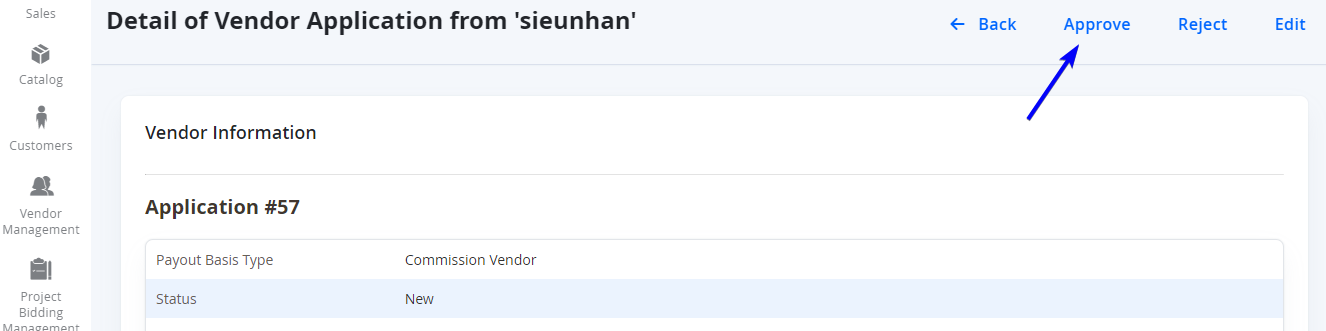
- If need to view more details of a submission, click on Select in the Action column of the grid, choose View to open the signup request details view. The details page contains all of the information that has been provided by the new vendor via the website front end.

Approving Sign Up Request
There are two ways to approve the signup request and onboard the vendor.
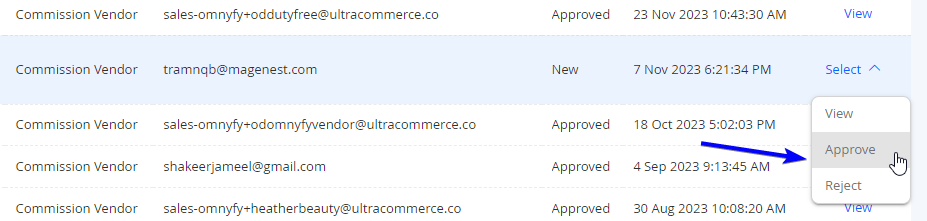
- In the Vendor Sign up grid view, click on the Approve option from the Select dropdown to approve the corresponding request.
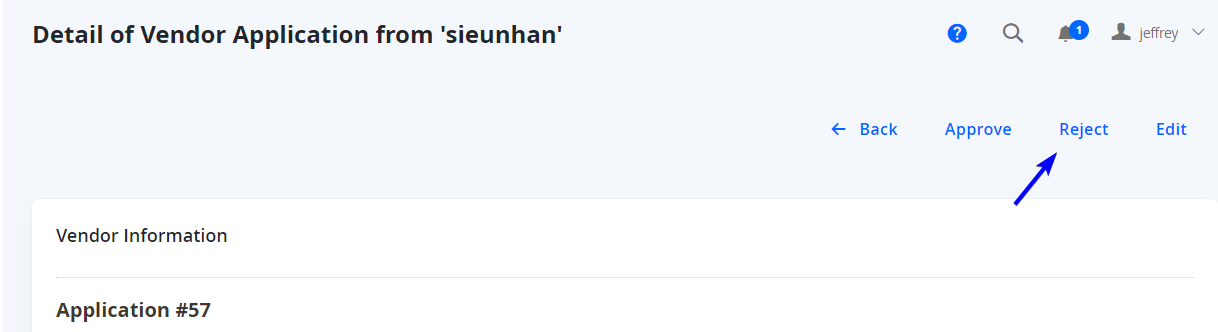
- In the Vendor Signup details view, click on the Approve button on the page action header to approve the signup request.
The Marketplace Owner will get an approval success message after approving the request, and 3 automated operations will happen.
- The vendor will receive a notification email which contains the approval message.
- A profile will be created under Marketplace Management > Vendor Profile. This will contain The vendor's business registration information, and later this will be the section that they proceed to fulfil their KYC. Note that it will be created as inactive until the 5 minute automated task (cron job) is run to automatically activate them, however you can manually activate them before this.
- A user will be created under System > All Users. This user will contain the vendor's contact details they registered with, and will also be assigned the user role from the subscription plan/vendor type they signed up with. Note that it will be created as inactive until the 5 minute automated task (cron job) is run to automatically activate them, however you can manually activate them before this.
Rejecting Sign Up Request
In the same way as approving, there are two ways to reject the signup request.
- In the Vendor Signup grid view, click on the Reject option from the Select action dropdown to reject the corresponding request.
- In the Vendor Signup details view, click on the Reject button on the page action header to reject the sign up request.
The Marketplace Owner will get a rejection success message after rejecting the request, and the vendor will receive a notification email contains the rejection information of the signup request.
Note: You still can approve a rejected request.
Editing Sign Up Request
Clicking on the Edit button in the request details view will change the form from 'Read Only' to an editable view. You can change the request information and then save them, so that the vendor profile will use the updated information once you approve this request.
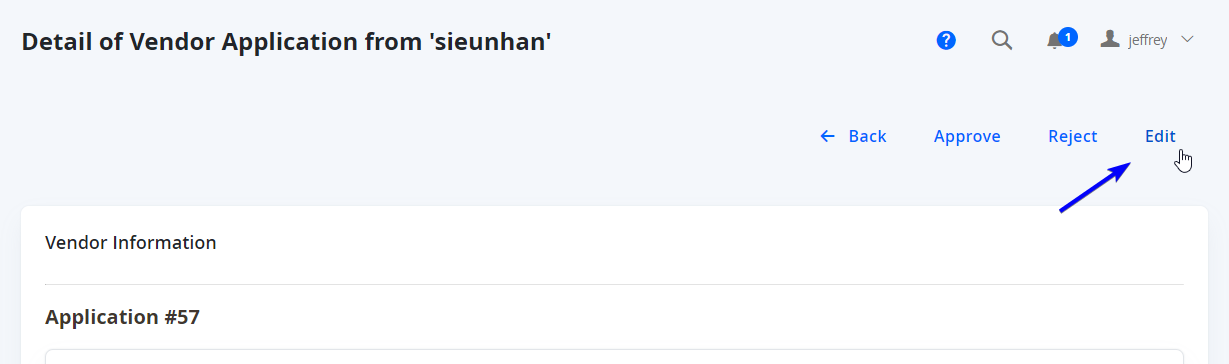
This is only available for sign ups with the status of New.