Managing Filters and Attributes for Custom Reports
With custom reports, you can change the dimensions, columns and filters that you'd like to use. See editing your Custom Reports here.
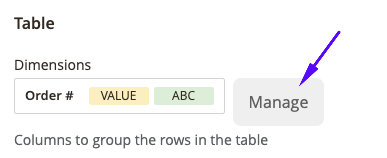
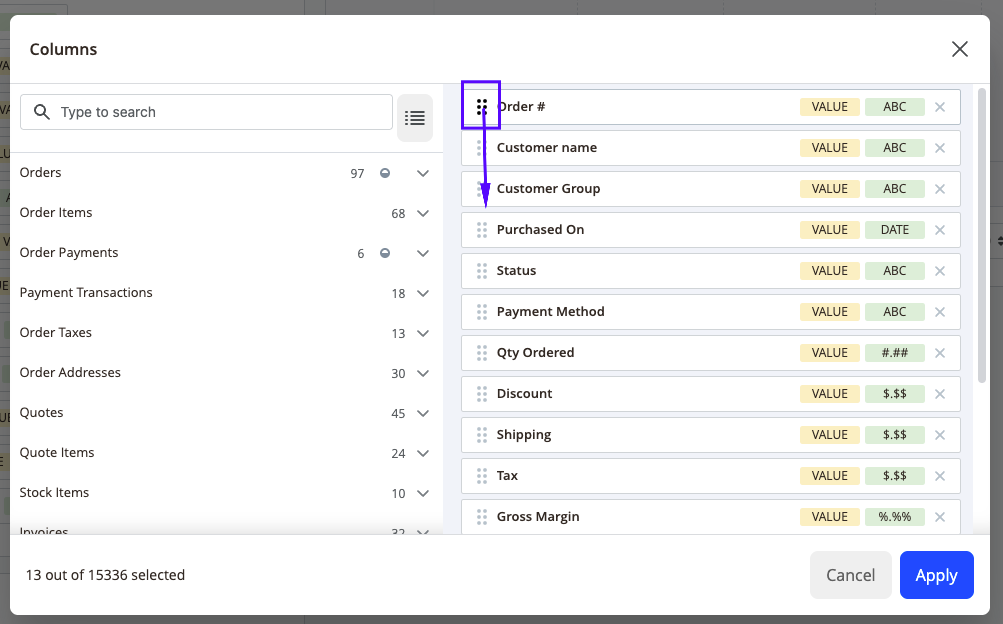
This view will open up when you are editing a report, and select Manage on either Dimensions or Columns.
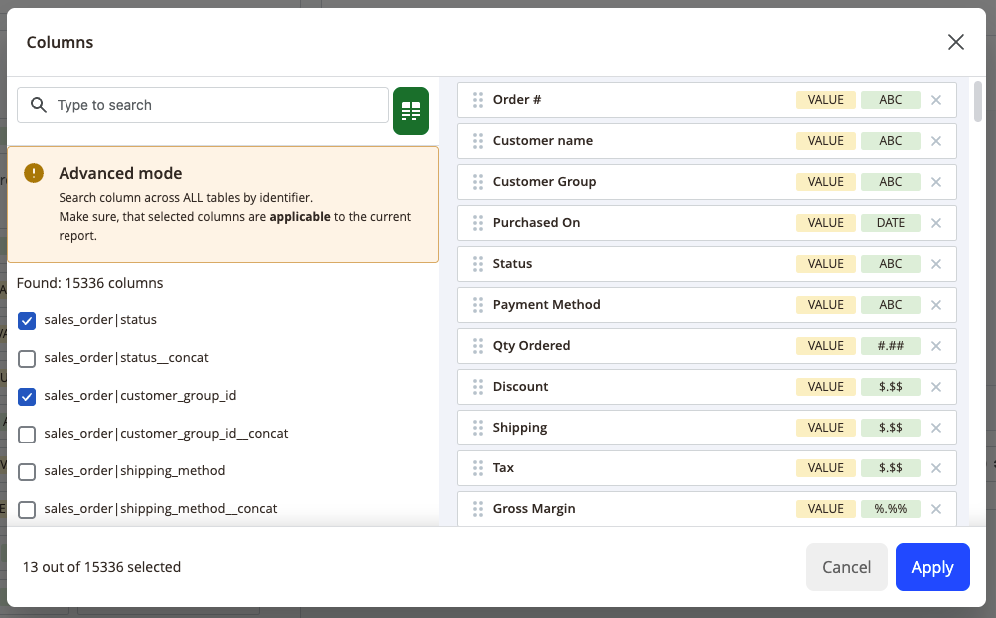
You can also see this when you choose Edit Columns in the report (remembering this is only valid for this view, but on refresh the next visit of this report). There are 2 modes that you can use to view the attributes, Basic and Advanced.
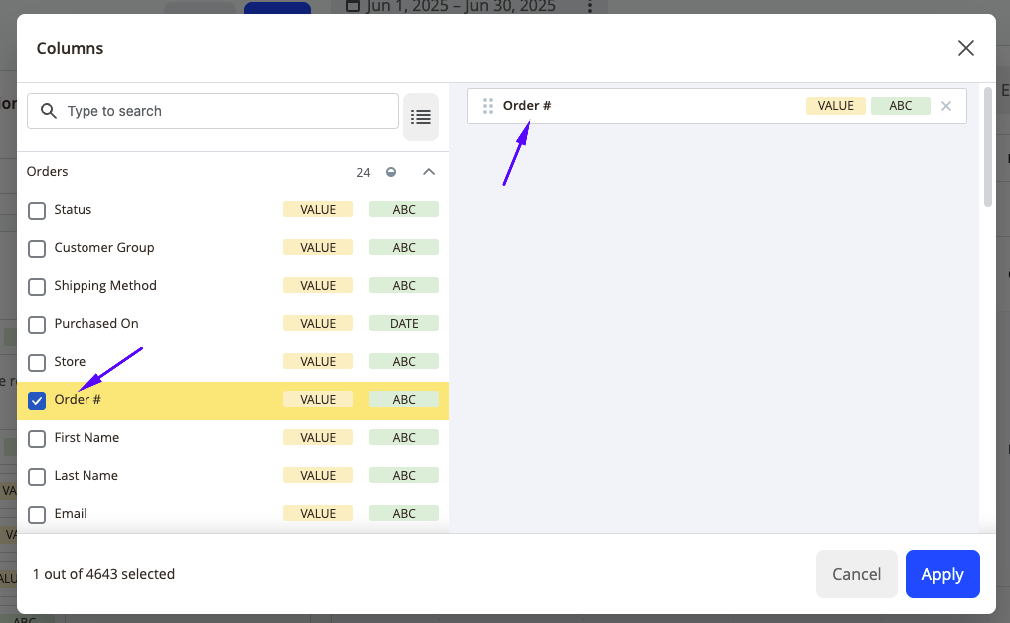
Basic mode
This will show you a list of simple attributes/columns you can add related to the order.

Advanced mode
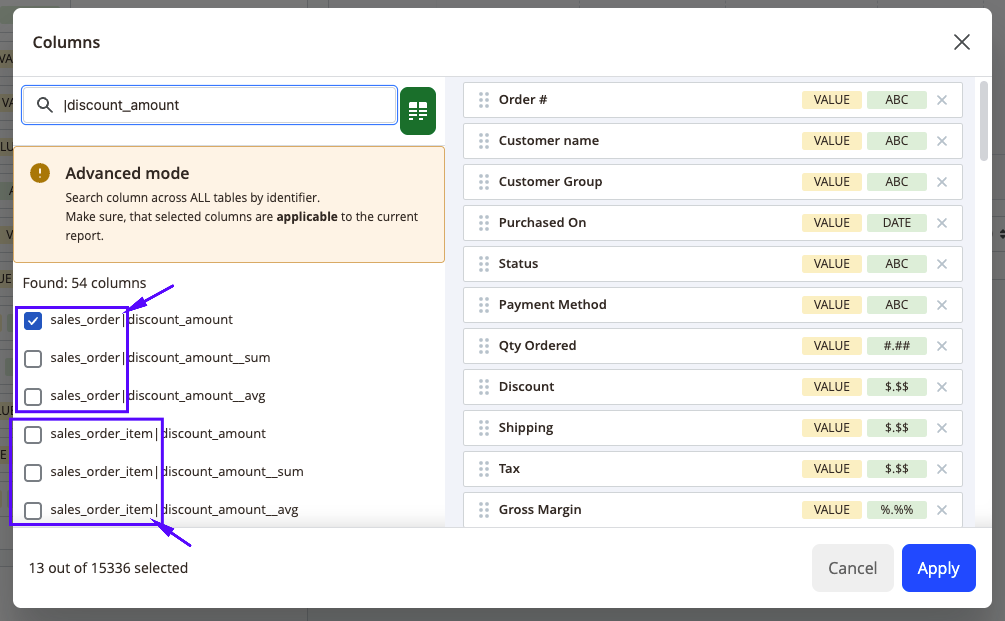
This will list all available tables from the database to make your report using database attribute labels instead of their name. Use this if you can't find the attribute on the Basic mode.
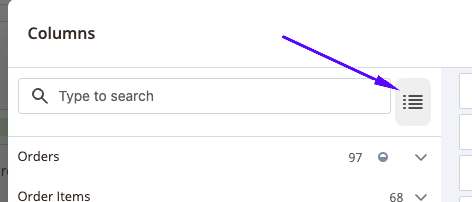
You can swap between modes by selecting the button next to the search bar.
Adding additional columns to the report
-
Navigate to Edit Report section (3 bars from the top right of your custom report)
-
Select either Dimension or Columns (depending what you want add) and click on Manage.
-
On the pop up, look through the available fields from the left and simply click on it so it will add it to your existing columns to the right.
-
You can also move these around to rearrange the order in the report using the 6 dots to the left of the field on the right window.
-
If you cannot find the column that you are after - press the toggle into Advanced mode to see all of the columns on the Marketplace.
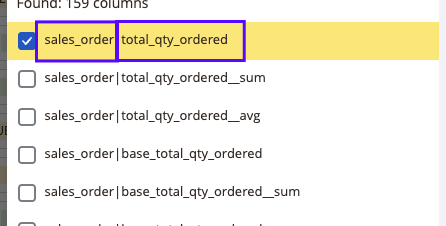
NOTEIn Advanced mode, you will see the tables, and the identifier (attribute) split by a divider - which will look like this table_name | field_name.
Here you can see sales_order | total_qty_ordered.
sales_order is the table that this identifier belongs in.
total_qty_ordered is the identifier of a certain attribute.
Aggregators
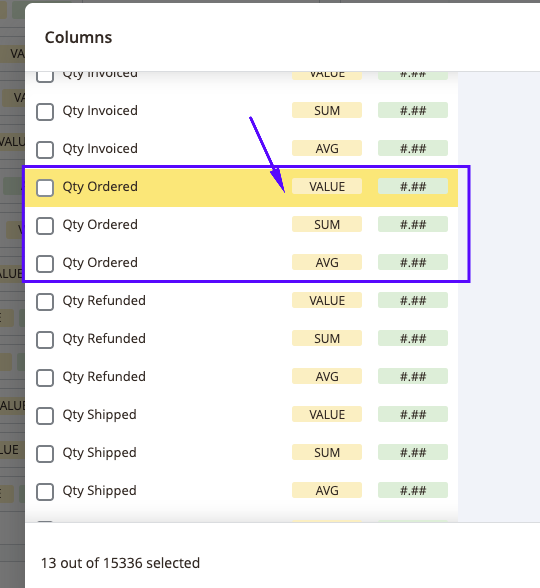
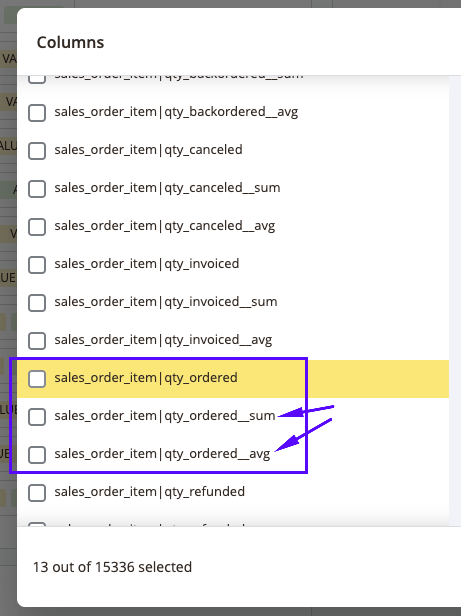
You may encounter some fields that appear multiple times, in which case you may not know what to select. The middle column of the Basic mode, or at the end of the attribute name in Advanced mode.
Basic mode
Advanced mode
| Aggregator | Description |
|---|---|
| SUM | Exports summary values. For example, the total aggregated SUM is added to a report, which will then display the summary value of grand totals from all orders for the specified day. Typically followed by __sum in the Advanced mode. |
| AVG | Represents the 'average,' and will be displayed as the summary value divided by the number of aggregate items. Typically followed by __avg in the Advanced mode. |
| COUNT | Used to get a total number of aggregated items, e.g the number of orders placed on a specified day. Typically followed by __cnt in the Advanced mode. |
| VALUE | Shows the exact value of a field. Do not aggregate data by this column, it may produce unintended results. |
| JOIN | This can display multiple values separated by commas, e.g. the each product in an order for the one column. Typically followed by __concat in the Advanced mode. |
Common identifiers to search for in Advanced mode
There are a few attributes that you may want to use in Advanced mode that you cannot find in Basic. We've listed a few commonly used attributes that you can add to your columns or dimensions.
One thing to note is that when you are copying any report, you will need to be mindful that some columns are set for the whole order, and some columns are set on per order item. When looking for attributes, ensure you are looking for the correct parameter (eg if it's for the whole order that you want, or each individual item). EG: Check the table if it is in sales_order (which will be values for the full order) or sales_order_item (which will be based on the individual product's attributes).
If you find the values are not matching, it may very well be the incorrect table or identifier that has been selected - so double check your report if it does not match.
Common Attributes
| Attribute | Advanced Attribute Code | Description |
|---|---|---|
| Sales Order Item: Vendor ID | sales_order_item | vendor_id | Shows the Vendor ID of the Vendor on that order. |
| Sales Order: Order Count | sales_order | entity_id__cnt | Shows the total number of orders for the dimension. |
| Sales Order Item: Item Count | sales_order_item | item_id__cnt | Shows the total number of items for the dimension. |
| Sales Order Item: Product Name (Concatenated) | catalog_product_entity | name_concat or sales_order_item | name__concat | Displays all the products for that order (use when Vendor ID is the dimension to show the products specific for this vendor). |
| Vendor Name | omnyfy_vendor_vendor_entity | name | Displays the name of the Vendor (you can use this to match the ID of the Vendor is using ID as Dimensions). |
| Product SKU | catalog_product_entity | sku | Display's the product's SKU - Use this for Dimensions to split order into different product rows. |
| Product Name | catalog_product_entity | name | Display's the individual products - use this when SKU is the individual |
| Vendor's Product Item Subtotal Price (Incl Tax) | sales_order_item | row_total_incl__sum | Shows the subtotal for the row totals based on the dimensions (eg by Order # and Vendor ID). |
| Vendor's Product Item Total to be paid out (Excl Tax)(Excluding Payout Fees) | omnyfy_mcm_vendor_order | vendor_total | Shows the subtotal for the row totals based on the dimensions (eg by Order # and Vendor ID), but also what is the expected payout without the fees (eg will be $0.00 if the order has refunded). |
| Payout Amount (incl Fees and Discounts applied) | omnyfy_mcm_vendor_order | payout_amount__sum | Shows the total that the vendor will be paid out, with fees and discounts already applied. |
NOTESome fields require the tables to be linked. For more information on this, please see our guide Linking Database Tables in Advanced Reports.