Configuring the Stripe Connect Webhook for Vendor Payouts
Creating the Stripe Connect Webhook
Once you have configured payouts in the Admin Portal, you will need to set up a Stripe Webhook for Stripe Connect.
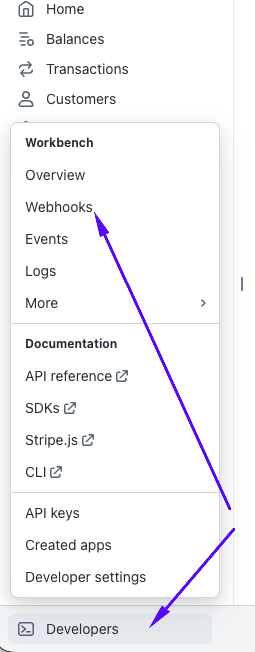
First, navigate to Developers > Webhooks from the bottom left of the page.
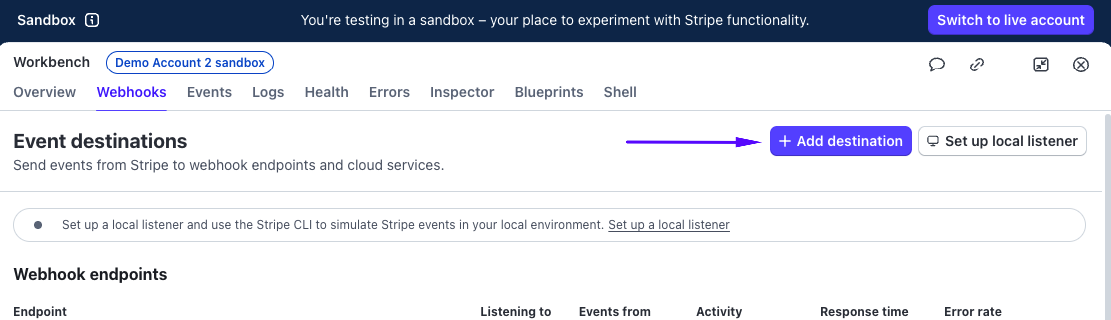
Your webhooks page will then appear with all existing webhooks / event destinations. Select Add destination from the top right of the page.
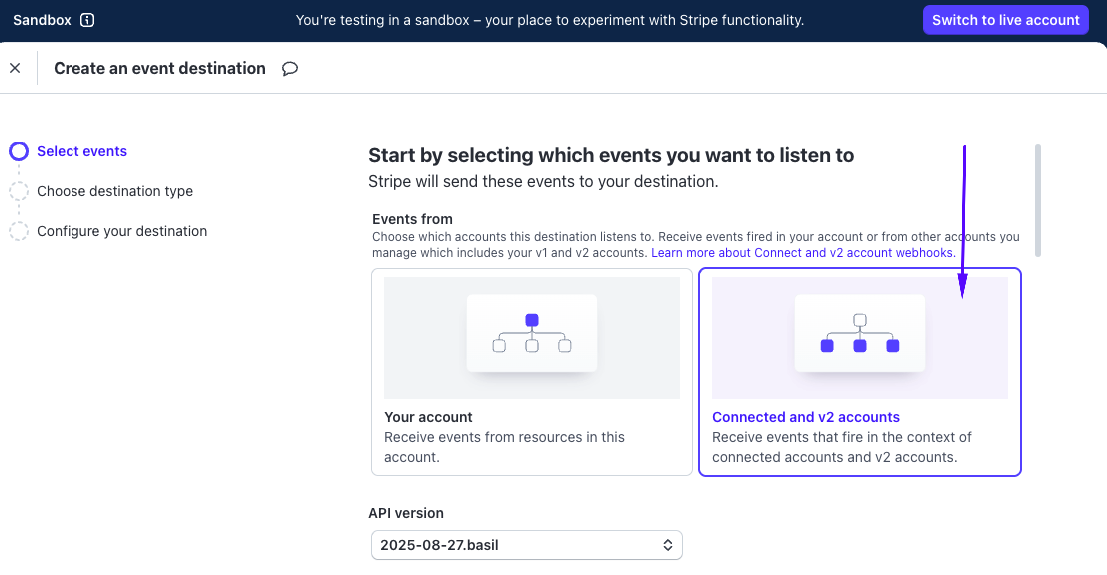
When a pop up appears and you are asked to select an event, choose Connected and v2 accounts.
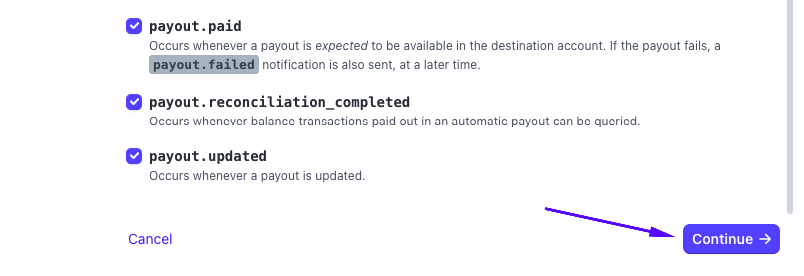
Select all of the following events:
| Events |
|---|
| payout.canceled |
| payout.created |
| payout.failed |
| payout.paid |
| payout.reconciliation_completed |
| payout.updated |
| account.updated |
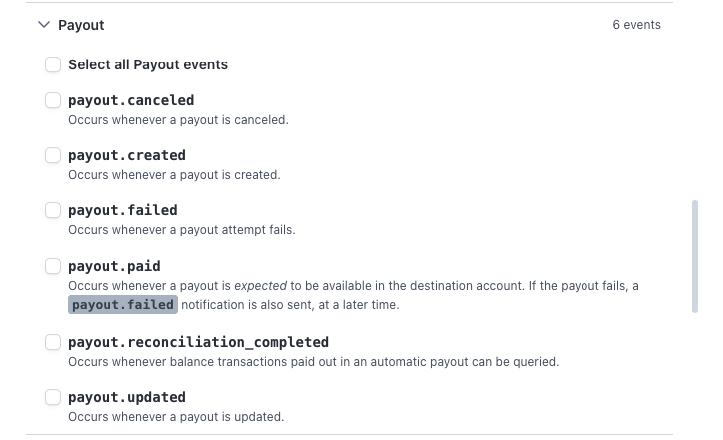
NOTE: You can scroll down in the All Events tab to search for the Payout dropdown and choose Select all Payout events.
Select Continue at the bottom right.
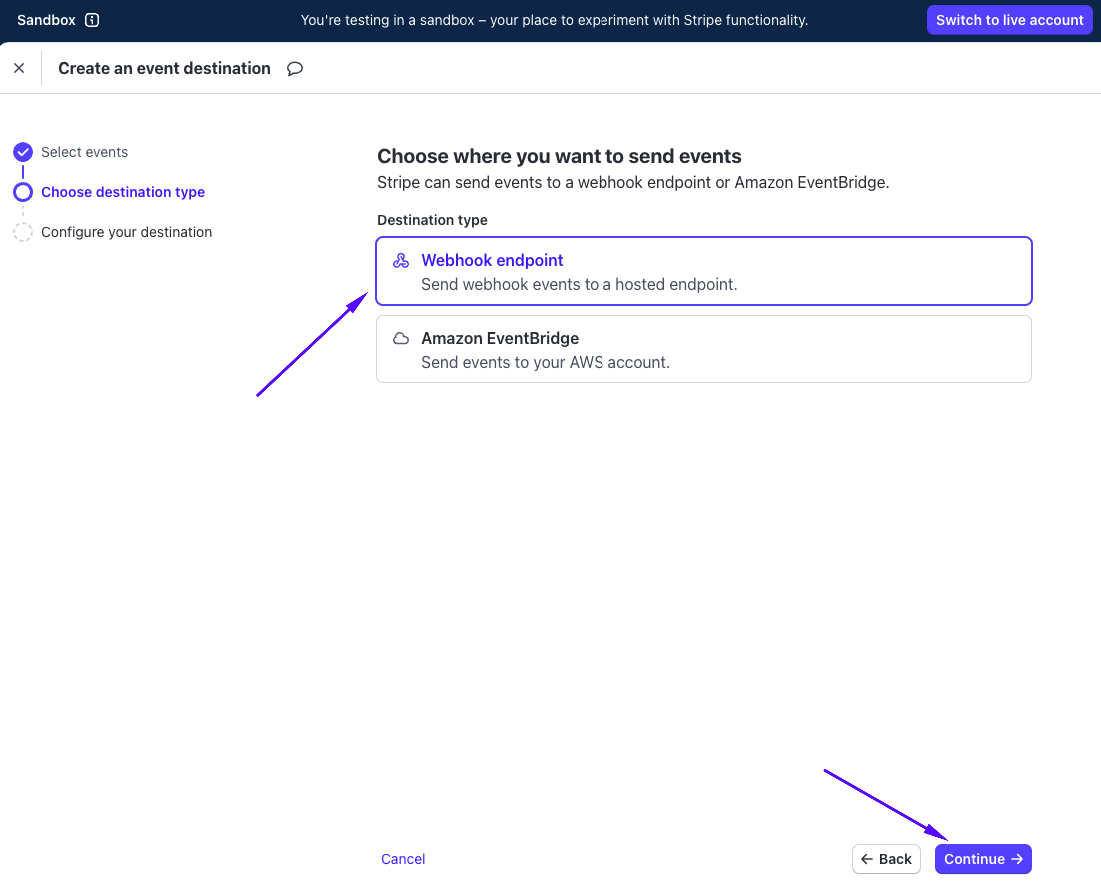
From here you can select Webhook endpoint and then choose Continue.
From here you can configure the destination.
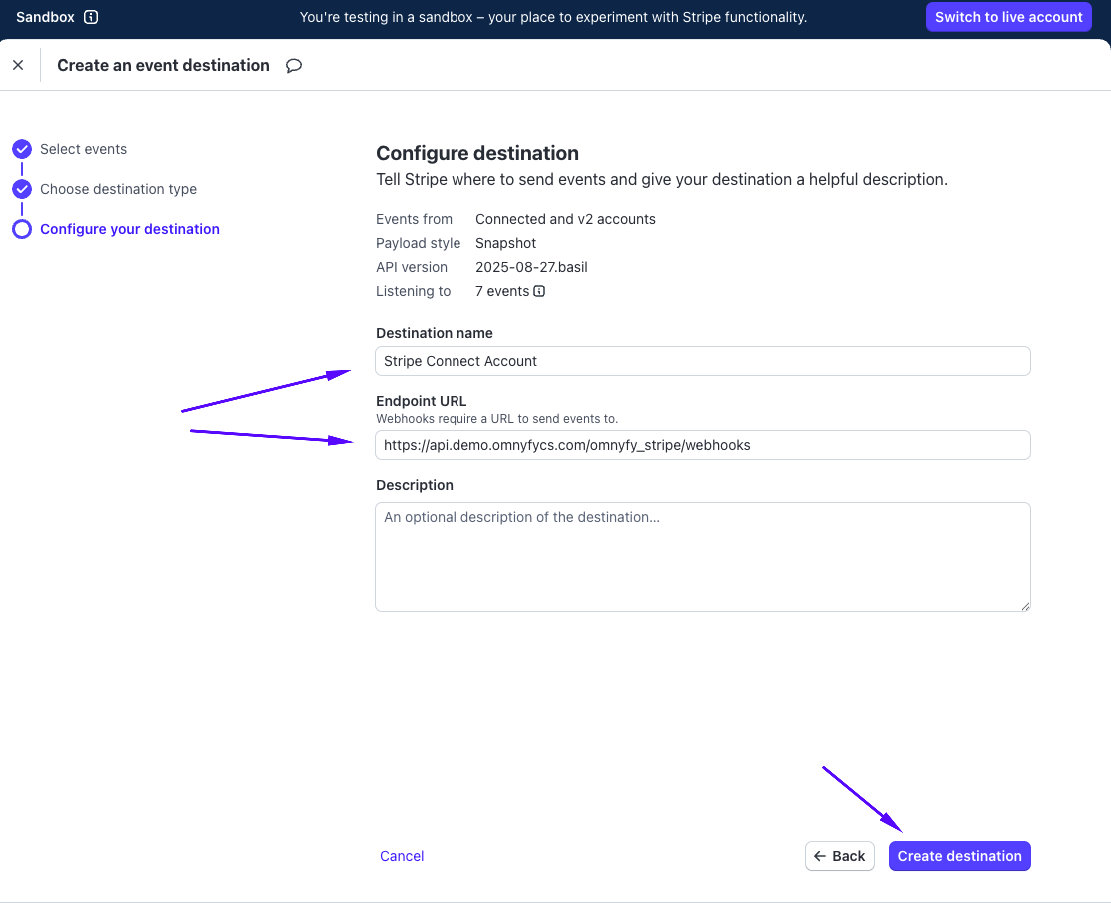
- Destination name: You can enter the description name that best describes the event.
- Endpoint URL: Please use the same URL prefix format as per Glyde / Non-Glyde webooks as the payment method. Then add "/omnyfy_stripe/webhooks" at the end of the URL - such as https://api.demo.omnyfycs.com/omnyfy_stripe/webhooks for a Glyde URL.
Select Create destination at the bottom of the page when completed.
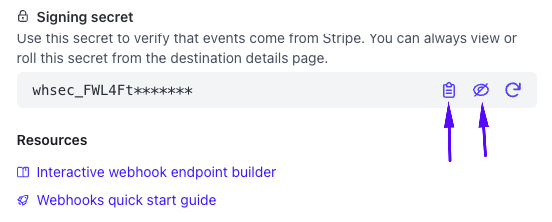
A new page will load where you can then see the Signing secret.
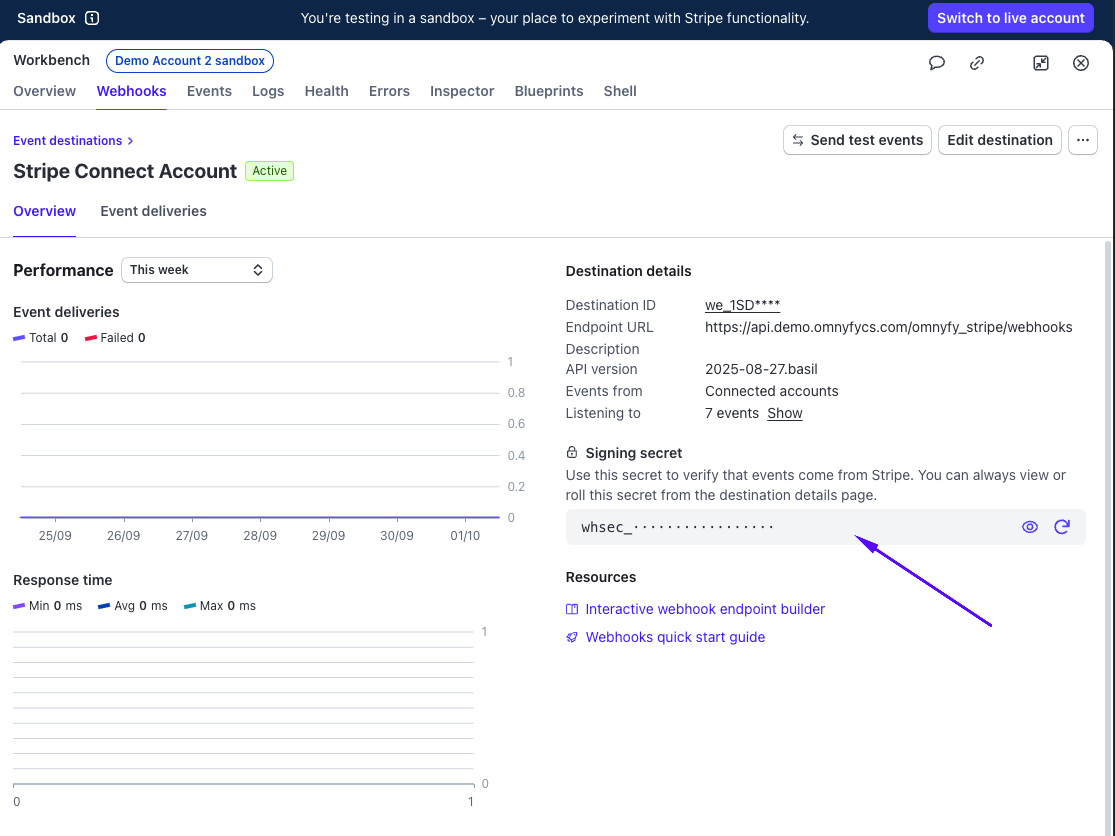
Select the Eye icon to reveal the Signing secret. Once revealed, you can also select the clipboard icon to copy the Secret Key. This will be used in the Stripe configuration.
Adding the Secret Key to the Admin Portal
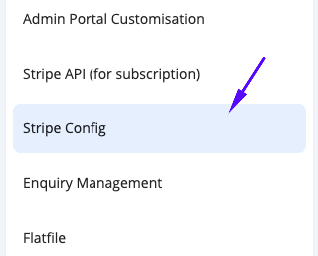
From the Marketplace Admin Portal, navigate to Stores > Settings > Configuration > Omnyfy > Stripe Config.
Paste the Signing Secret in the Connect Account Webhook Signing secret field here.
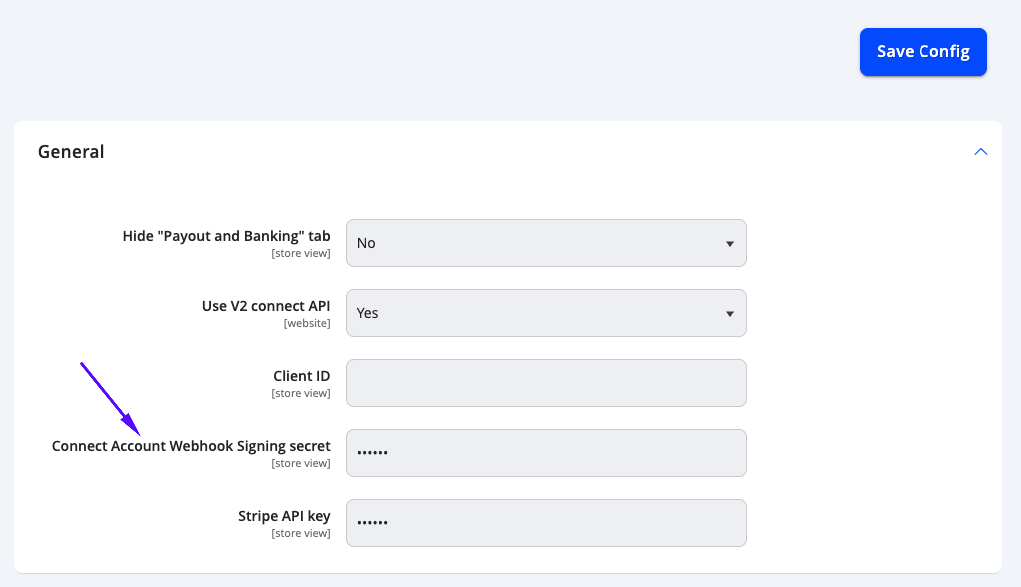
Select Save Config in the top right.